Mac os time machine is a backup/restore tool that can help you to manage your mac os backup/restore easily and flexibly. This article will tell you how to use it.
1. Prerequisites.
- First, you should get a big enough USB disk to save your backup os files. If the USB disk space is not enough, you may encounter an error message like below in a dialog.
Time Machine couldn’t complete the backup to “WININSTALL”.

The backup disk needs 121.61 GB for the backup but only 14.77 GB are available. Select a larger backup disk or make the backup smaller by excluding files.
- You can also use a mobile hard disk drive to replace the USB disk, mobile hard disk drive has much more space than a USB disk.
2. How To Exclude Backup Files In Mac OS Time Machine.
- There are 2 methods to resolve the above issue. Method 1: use another big USB disk, Method 2: exclude some files follow the below steps.
- Click the Options… button in the above dialog to open the Exclude these items from backups dialog. Then click
+button to add exclude folder or files. - After select, click the Save button to save the excluded files, then the time machine will not backup those files.
3. How To Use Time Machine To Backup Mac OS.
- Click Apple icon —> System Preferences… menu item at the top left corner to open mac os system preferences window.
- Then click the Time Machine icon in the window to start the time machine tool.
- Click the Select Backup Disk… button to select a backup disk. Usually, we use a USB disk to backup. But first, you should make sure your USB disk is mounted on mac os, if not you can not see it in the backup disk selection list like the below picture.
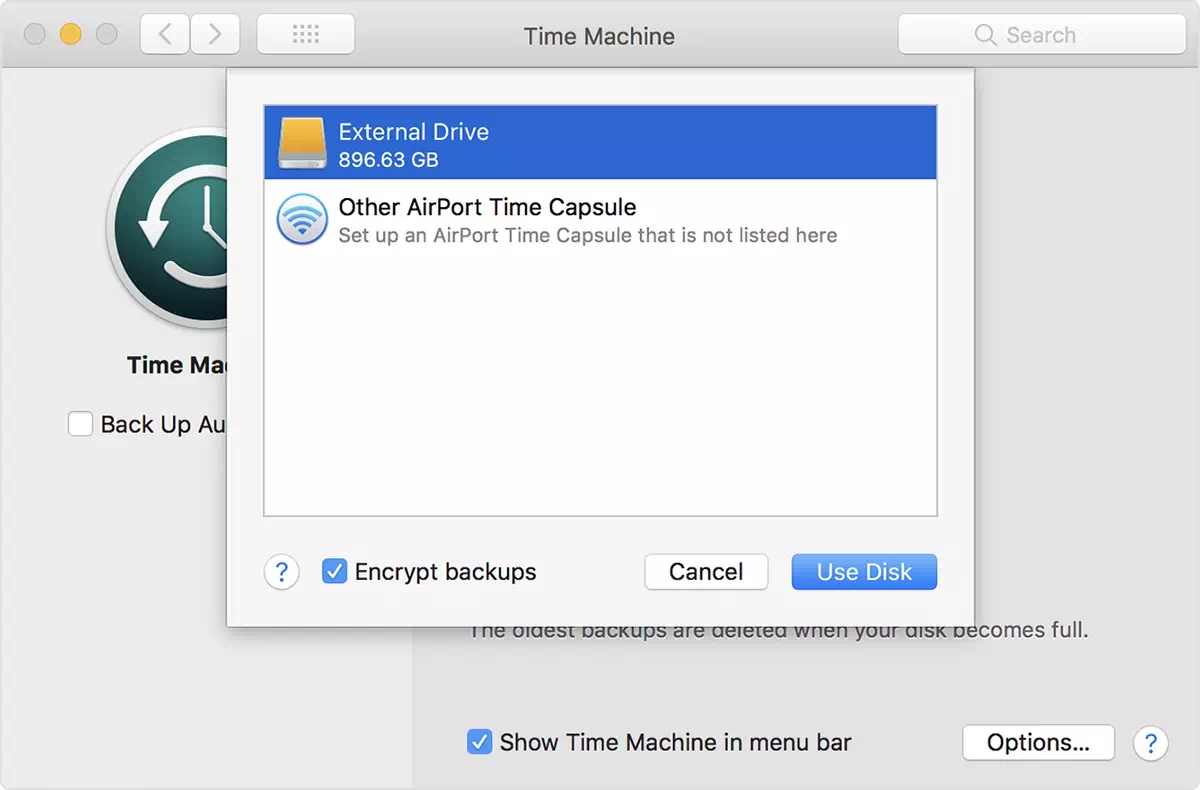
- If you check the Encrypt backups checkbox, then click the Use Disk button, it will popup a window that lets you input a password to protect the backup disk, after that every time you access the disk, you need to input the password.
- Make sure to check the Show Time Machine in menu bar checkbox in the Time Machine window, this will add a time machine icon ( a clock icon ) in the menu bar.
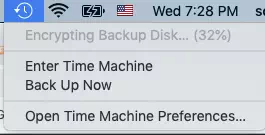
- Although time machine backup is processed automatically, you can also take manual backup by clicking the Back Up Now button in an above time machine menu list.
- The auto-backup happened just after your select the backup disk. The first-time backup may take longer, but the subsequent backup will only backup the changes to save time.
- As you can see from the time machine dialog, it will backup all your selected files hourly, daily, and weekly. If the backup disk is full, the older backup will be overridden.
4. How To Restore From Mac OS Time Machine Backups.
- Restore is very straightforward, when you start mac os installation, it will popup the macOS Utilities window first. Just select the first item Restore From Time Machine Backup, then it will ask you to select the backup disk, and continue the restore process.