1. What Is A Django Model.
- A Django model is used to represent a data model. In general, one model is mapped to one database table. The Django model can make data manipulation easy and flexible. You do not need to care about the database table operation. What you need to do is define and use Django models.
- In the Django project, you should define the Django model in the project’s application’s models.py file ( in this example, the file is located at DjangoHelloWorld / user_register_login / models.py ). The model class should extend django.db.models.Model class. And you can define multiple model classes in the models.py file. For one model class, you should specify the model field name and field type. There are multiple model field types, please refer Django model official website FieldType section.
2. Define Django Model.
- This example is based on Django User Registration And Login Use Built-in Authorization Example and Django Cookie Session Example. You can read those two articles when you need.
- In this example, there are two model classes defined in the models.py file.
- Department model: This model saves employee belonged department information.
- Employee model: Record employee information. It has two foreign key fields, one is referred to django.contrib.auth.models.User model ( Django built-in auth user model ) to record employee username and password etc, the other is referred to Department model to save employee belonged department information.
- Below is the DjangoHelloWorld / user_register_login / models.py source code.
from django.db import models
from django.contrib.auth.models import User

# create Department model, this model will be mapped to table user_register_login_department in sqlite db.
class Department(models.Model):
    # define department name and description columns, the id column will be added automatically.
    dept_name = models.CharField(max_length=1000)
    dept_desc = models.CharField(max_length=1000)

    # this function will be invoked when this model object is foreign key of other model(for example Employee model.).
    def __str__(self):
        ret = self.dept_name + ',' + self.dept_desc
        return ret

    # this is a inner class which is used to define unique index columns. You can specify multiple columns in a list or tuple.
    class Meta:
        unique_together = ['dept_name']

# create Employee model, this model will be mapped to table user_register_login_employee in sqlite db.
class Employee(models.Model):
    # Employee has two foreign key, user(Django built-in auth_user table) and department.
    user = models.ForeignKey(User, on_delete=models.CASCADE,)
    dept = models.ForeignKey(Department, on_delete=models.CASCADE,)
    emp_mobile = models.CharField(max_length=100)
    # should add the () after IntegerField, otherwise the emp_salary column will not be created.
    emp_salary = models.IntegerField()
    # if do not specify the auto_now=True attribute with value then this field can not be created.
    emp_onboard_date = models.DateTimeField(auto_now=True)

    # this method will be called when other model reference Employee model as foreign key.
    def __str__(self):
        return self.user.username + ',' + str(self.emp_salary) + ',' + str(self.emp_mobile)

    class Meta:
        unique_together = ['emp_mobile']
3. Manage Django Models In Admin Site.
After define models in the Django application’s models.py file. You can manage them on the Django project admin website follow the below steps.
- Open a terminal and cd into your Django project folder.
- Then execute the below command to migrate the model to the local SQLite database, which means the command will create a model-related database table in the Django project’s SQLite database.
# first go to your Django project root folder then run below scripts.
> python3 manage.py makemigrations user_register_login
> python3 manage.py migrate
- When the above script executes successfully, use an SQLite browser such as SQLite studio to browse the Django project’s SQLite DB file( DjangoHelloWorld / db.sqlite3 ), then you can find two tables has been created. The table name is Django-application-name_model-name.( model mapped table name are : user_register_login_department, user_register_login_employee)
- Add models in the Django application’s admin.py file. In this example, add below code in DjangoHelloWorld / user_register_login / admin.py. Please see the comments for a detailed explain.
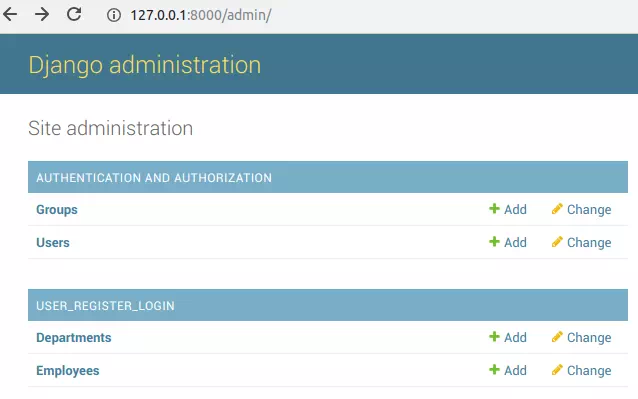
from django.contrib import admin # the module name is app_name.models from user_register_login.models import Department, Employee # this class define which department columns will be shown in the department admin web site. class DepartmentAdmin(admin.ModelAdmin): # a list of displayed columns name. list_display = ['id', 'dept_name', 'dept_desc'] # define search columns list, then a search box will be added at the top of Department list page. search_fields = ['dept_name', 'dept_desc'] # define filter columns list, then a filter widget will be shown at right side of Department list page. list_filter = ['dept_name'] # this class define employee columns that will be shown in the employee admin web site. Note the foreign key value will be displayed automatically. # the foreign key is user and dept which reference other model, so the user or department model's __str__(self) method will be called and the return value will be displayed. class EmployeeAdmin(admin.ModelAdmin): # a list of displayed columns name, the user and dept foreign key will display related model's __str__(self) method returned string value. list_display = ['id', 'user', 'dept', 'emp_mobile','emp_salary','emp_onboard_date'] # Register your models to admin site, then you can add, edit, delete and search your models in Django admin site. admin.site.register(Department, DepartmentAdmin) admin.site.register(Employee, EmployeeAdmin) - Now login Django project admin web site use url http://127.0.0.1:8000/admin/. And you can see below user_register_login app’s model list page.
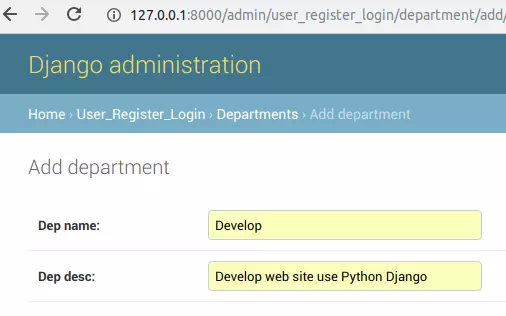
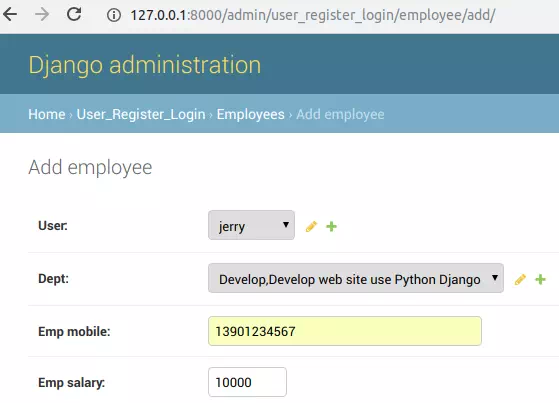
- Click Add link at the end of each model to add Department and Employee like below.
Add Department.
Add Employee.
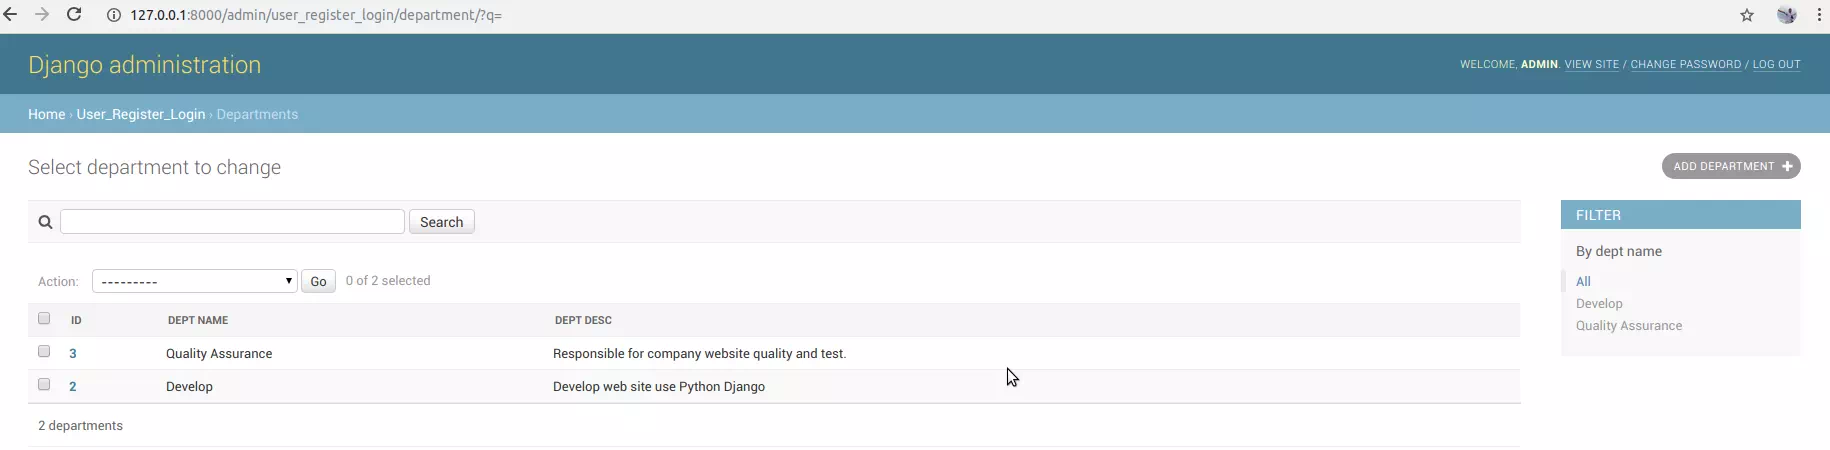
- Below is the Department list page.
- Below is the Employee list page. Please note the DEPT filed value in the list is the string that the Department model class’s __str__(self) method returned.

- Now browse the Django project SQLite database table again, you can find the department and employee data has been added in related tables.