When you develop an iOS app use swift, you can make the UI components fixed size. But iOS devices have different screen sizes, so the fixed size UI components will render differently on different iOS devices. Even when you change the same iOS device’s orientation from portrait to landscape, the fixed size UI design will make the app appear ugly like the below video, when you change the screen orientation, the three button’s width will not full fill the screen width, this is not user friendly.
The above youtube video URL is https://youtu.be/n1u_R_3iupQ.
To fix this issue, swift provide UI constraints for you to make UI component auto-layout responsively to the iOS device screen size change. After setting UI component constraints, you can make the UI component automatically change the layout to match different iOS screen sizes or when the screen orientation is changed.
The below video shows the result after changing the three button’s constraints to make it auto-layout responsively. You can see when the screen orientation is changed from portrait to landscape, the three button’s width will fully fill the screen width responsively.
The above youtube demo video URL is https://youtu.be/A6uIpC_DPHQ.
1. How To Choose Different iOS Device Simulator Or Change Screen Orientation In Xcode.
- Click the
Main.storyboardfile in Xcode swift project, then you can see all the iOS device simulator icons at the center bottom of View Controller Scene. You can choose one iOS device simulator to preview the screen in the View as area. You can also change the iOS device orientation by click the Portrait or Landscape icon.

- If you can not see the above iOS device simulator list, you can close both the left and right side panels in the Xcode project, then you can see it.
2. How To Use Swift Constraints To Constrain UI Component.
There is an auto-layout menu bar at the right side of the View as device simulator icon list, it provides five buttons for you to constrain UI components or align multiple UI components. Below are the steps about how to use it.
2.1 Add Layout Constraints To UI Component By Drag & Drop To Main Storyboard View Controller Scene.
- Click the Xcode project’s Main.storyboard file to open and edit it.
- Add one or two UI components into the View Controller Scene from the UI component library. I add one Button and one Activity Indicator to it.
- Press the Control key and drag the Activity Indicator object to the iPhone top area at the same time use the mouse key, it will display a blue line between the Activity Indicator and iPhone’s top area. You can see this step demo video in the youtube URL https://youtu.be/ncxRzEHz1fk.
- When you release the mouse key, it will popup a dialog that contains multiple items to let you define layout constraints. You can select any item to add top, bottom, leading or trail layout constraints between the activity indicator and the iOS device screen safe area. You can also add center layout constraint to the activity indicator to make it layout center both in the horizontal or vertical direction.
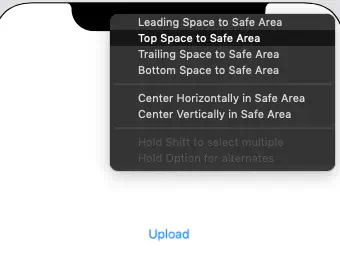
- If you want to add constraints to the Upload button below the activity indicator, you can press the Control key and drag & drop the Upload button to the activity indicator use the mouse key. You can see this step demo video in the youtube URL https://youtu.be/UbAaaEjlKP0.
- When you see the blue line, you should release the mouse key, then it will popup a dialog that lets you add layout constraints between the button and the activity indicator. You can click different menu items to add different layout constraints between the button and the activity indicator.
2.2 How To Pin A UI Component On The Scene Use Swift Constraints.
- Add a UI component ( a button ) to the Main.storyboard scene. Change button background color to green and button text color to red, also change the button text font.
- You have two methods to add constraints to it.
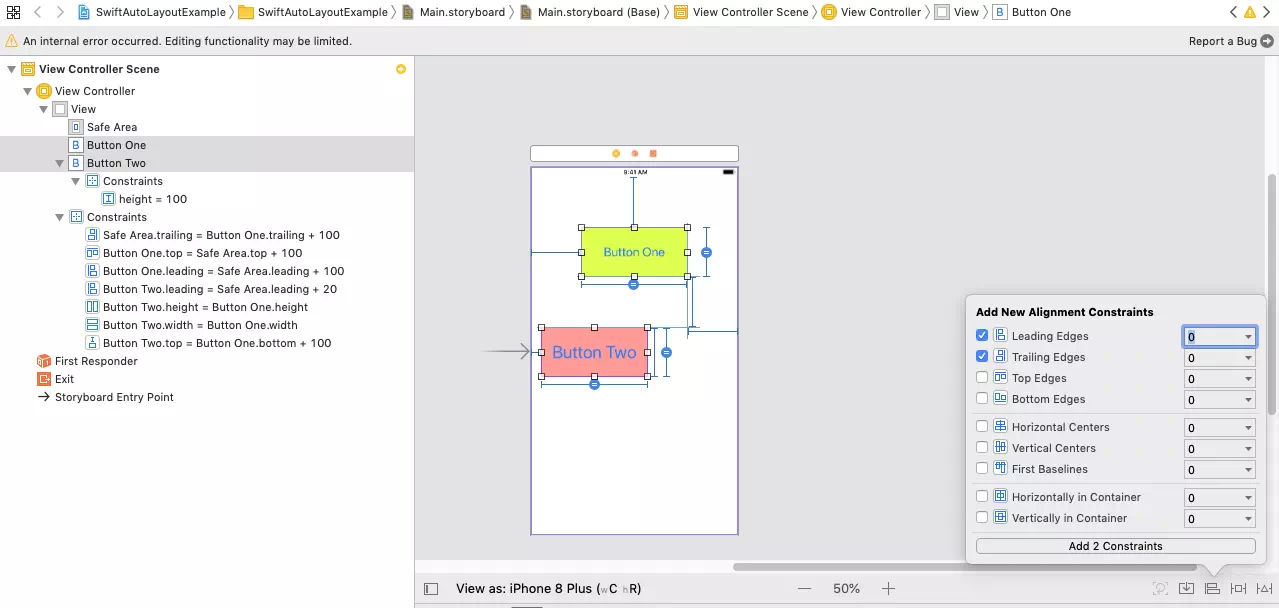
- Select the above button, click the Add New Constraints icon (
 ) on the above auto-layout menu bar.
 - Then it will popup the Add New Constraints dialog where you can specify the button constraints value in it.
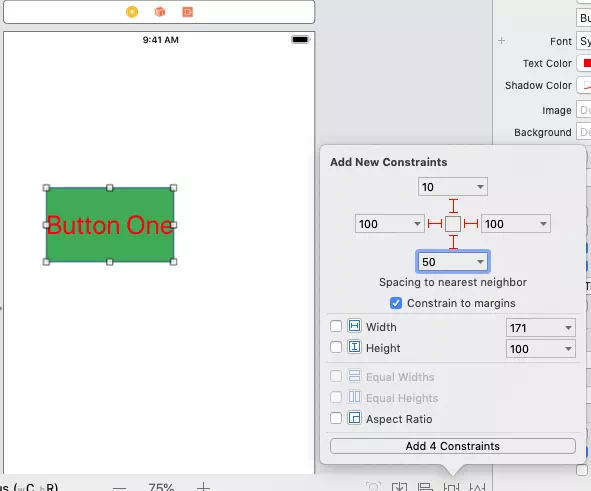
- You can specify 4 space constraint constant values for the button in 4 directions. If you change the space constraint constant value like the above dialog, this means the distance between the button and its nearest left and right UI component are both 100, and the distance between the button and its nearest top UI component is 10, the distance between the button and it’s nearest bottom UI component is 50.
- Click the Add 4 Constraints button in Add New Constraints dialog, you will see the button has been moved and the button size has been changed also to match the screen, and there are 4 t-bars( the line between the button and screen safe area edge ) which connect the button to the nearest UI component. If there are no UI components between the button and the screen safe area edge, then the space distance value is between the button and the safe area edge.
- If you want the button to full file the screen width, just input 0 in the left and right space constraints value input box.
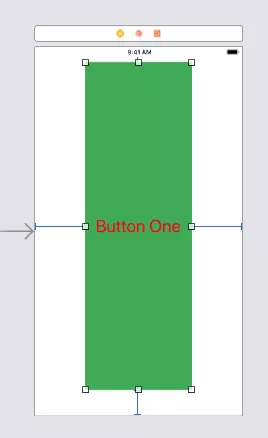
- When you change the screen orientation, you can see the button change its layout and size automatically to responsively match the screen orientation change. You can see this step demo video on youtube URL https://youtu.be/WvgSJyrctaM.
- Now you can see the above 4 constraints have been added under the View Controller Scene —> View Controller —> View —> Constraints item. You can understand their meaning directly. If you want to remove one constraint, just select it and press the delete key on the keyboard.
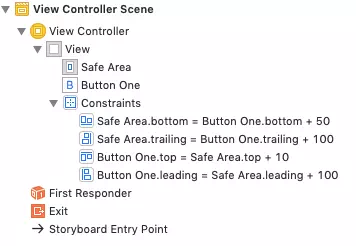
- If you want to edit one constraint value, just select it, and then edit it in the Attributes Inspector pane ( How To Display Xcode Library, Assistant Editor, Inspectors Window ) on the Xcode project right side. You can change the First Item, Relation, and Second Item in the drop-down list, the Constant input text box value is the constraint value.
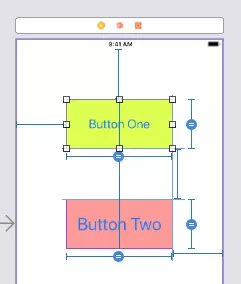
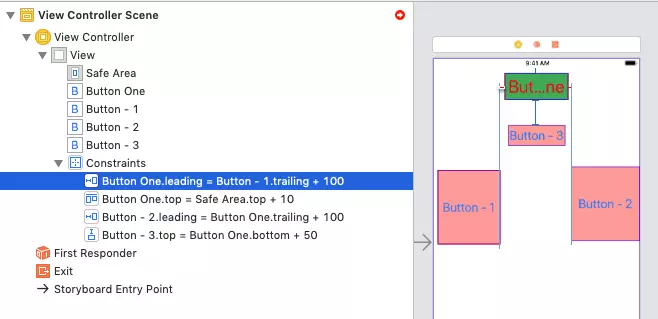
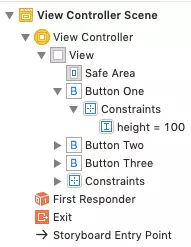
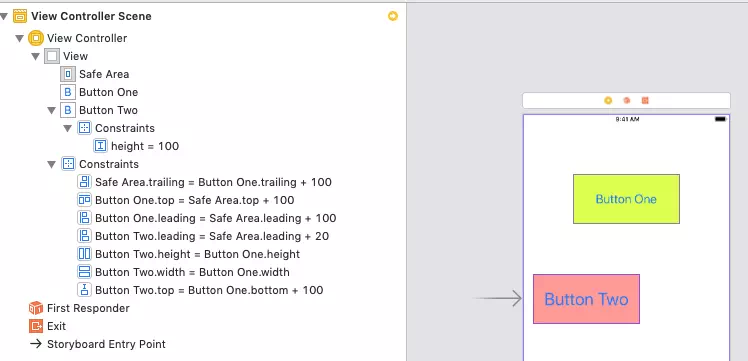
- Now delete all the above constraints, and add three buttons around Button One like below. Add the above constraints to Button One again, you will see the below picture. You can see that now the constraints are applied between Button One and the three buttons because there is no button above Button One, so the top constraints do not change.
- Besides 4 direction nearest UI component space constraints, you can also add constraints to the button’s width and height by select the checkbox before Width and Height, then select or input the width and height value from the drop-down list after it in the Add New Constraints pane.
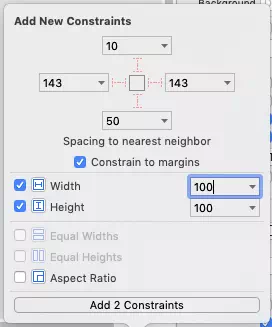
- When you click above Add 2 Constraints button, you can see the width and height constraints have been added for Button One in View Controller Scene —> View Controller —> View —> Button One —> Constraints.
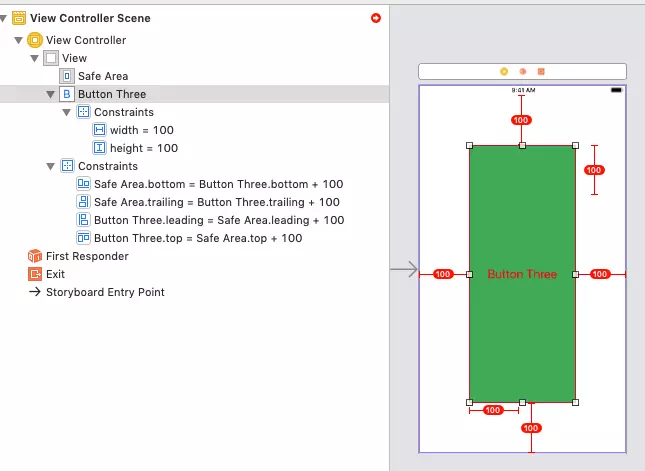
- Please note direction space constraints priority is higher than UI component size ( width, height ) constraint. So that if you set both direction space constraints and component size constraints at the same time, direction space constraints will take effect first. We can see this in the below picture, although we set Button Three‘s width and height to 100, the button’s real size is not 100 because there are also 4 direction space constraints.
2.3 Make Multiple Swift UI Components Equal Width & Height.
- Add two swift buttons, and set constraints to each button as below picture.
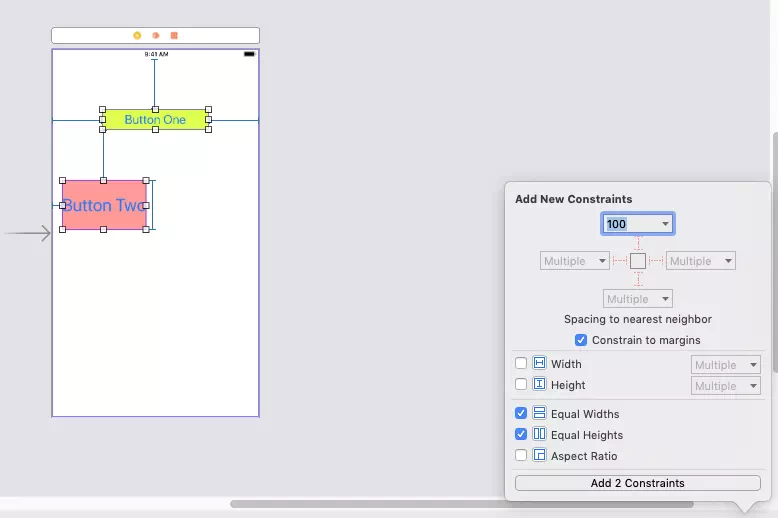
- Press the Shift key and click the two buttons one by one to select them all, then click Add New Constraints icon in the auto layout menu bar, check the Equal Widths and Equal Heights checkbox, then click Add 2 Constraints button.
- After click Add 2 Constraints button, you will see the two buttons have the same width and height as below.
2.4 Fix Swift UI Component Constraints Issue.
- If there are some constraints errors or warnings, the t-bars line will change to red or orange, to fix these issues or errors, just click the Resolve Auto Layout Issues icon (
 ) in the auto layout menu bar. It will pop up a dialog, you can choose the menu item to update, reset, or clear error constraints.
3. How To Use Swift Constraints To Align Multiple UI Components.
After add and pin swift UI components on the view controller scene with constraints, you can also align them use the swift constraints align button ( ![]() ). Below is an example.
). Below is an example.
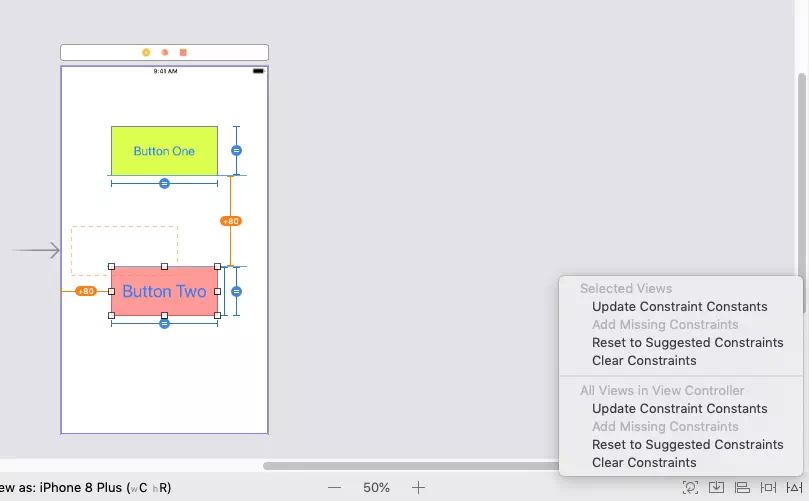
- Select the two buttons in the above example, then click Align button (
 ), it will popup a dialog, check the Leading Edges or Trailing Edges checkbox, and input the leading edge or trailing edge value.
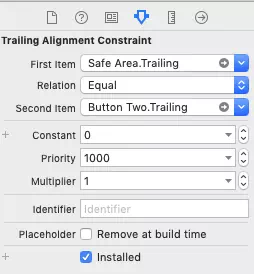
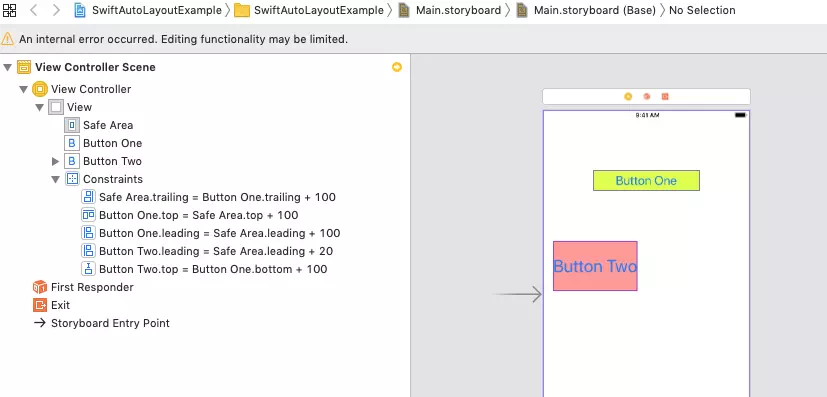
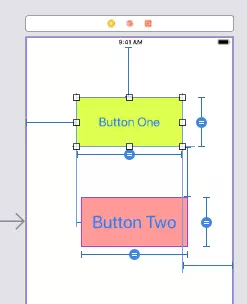
- I input 10 in the Leading Edges value, this will make Button Two’s left edge 10 points away from Button One’s left edge like the below picture. To make this configuration take effect, you should remove the
Button Two.leading = Safe Area.leading + 20constraints first. Because this constraint will restrict Button Two from moving from left to right.
- Remove constraint
Button Two.leading = Button One.leading + 10, then select the two buttons, and click Align icon ( ), select the Horizontal Centers checkbox, and click Add 1 Constraints button to add this constraint, then the two buttons will be aligned by the screen center horizontally. If you want to align one button horizontally on the screen, just select one button and select the checkbox Horizontally in Container.