When you add a UI component such as a button in the interface builder of the Xcode project, you can adjust it’s position by hand. For example, you place the button at the center position both horizontally and vertically. But when you preview the screen on different devices or in different screen orientations. You will find the button is not layout properly. This article will tell you how to resolve this problem.
1. UI Layout Not Properly Problem.
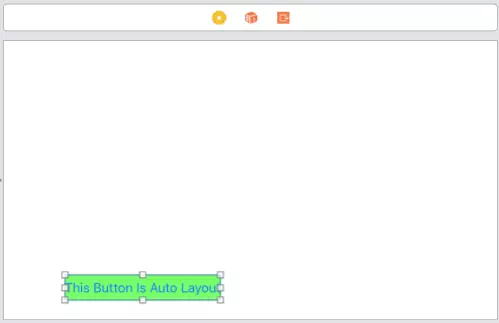
- In this example, there is a button at the screen center. But when you change the screen orientation from portrait to landscape, you will find the button’s position does not behave as expected like below. You can also choose different iOS devices in the bottom View as : area to see the change, but the problem still exists.
- This is because we do not add constraints to apply the auto-layout feature to the button to make it responsive to the orientation or device size change.
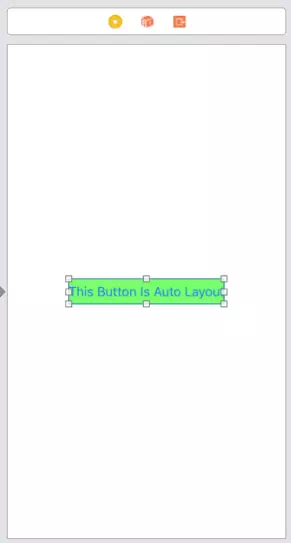
- Below is the original button position in the Xcode interface builder screen.
- Below is the button position when you change the screen orientation from portrait to landscape, but the button will not be displayed at the screen center as we expected.
2. Add Auto Layout Constraints To UI Component.
- There are five icons at the interface builder bottom right side. Each icon has unique constraint management functions.

- Align icon: Choose UI component layout align-types between view components, such as align to left, right, top, center, and bottom.
- Add New Constraints icon: Add constraints value based on the align type.
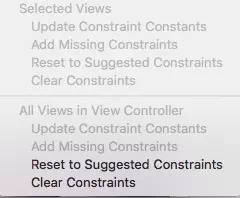
- Resolve Auto Layout Issues icon: Resolve issues during constraints change, such as reset, clear, or add missing constraints, etc.
- To add the auto layout constraints, just select the button and then click the Align icon and check Horizontally in Container and Vertically in Container checkbox. Then click Add 2 Constraints button to save them.
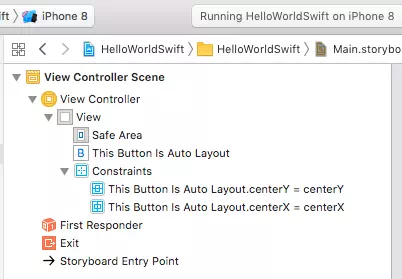
- After that, there will add two constraints in the document outline view under View Controller Scene —> View Controller —> View —> Constraints. Now in every device and orientation, the problem has been fixed. The button will change it’s position automatically when the screen change.
3. Custom The Button Auto Layout Constraints.
- Now the button will be positioned at the screen center in both orientations.
- But how to do it if you want to place it in a special position. You can achieve this by changing the properties of the constraint like below.
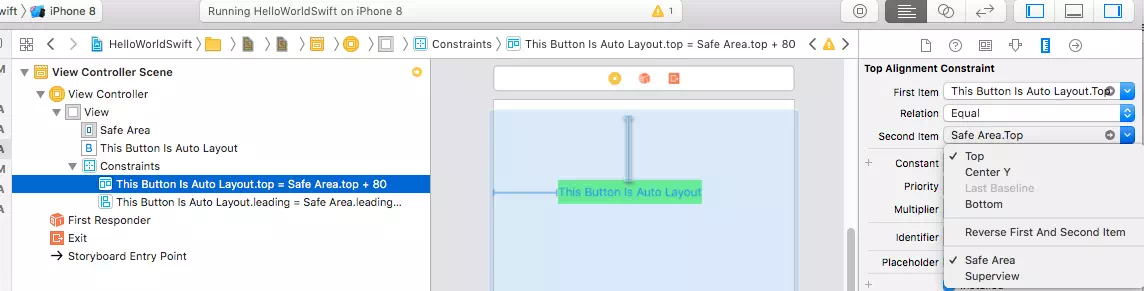
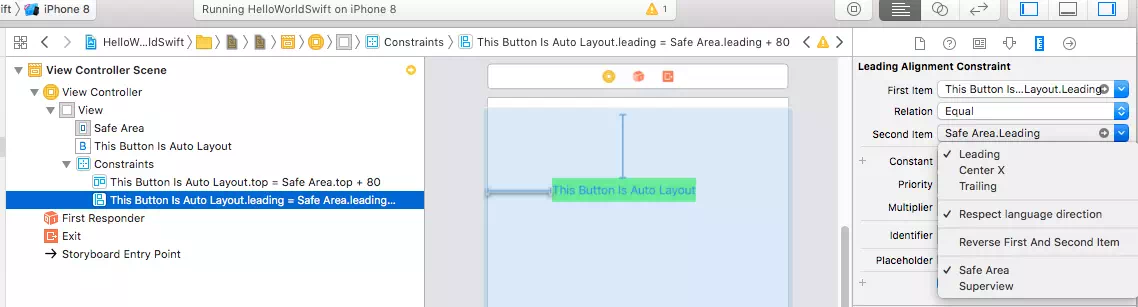
- Select one constraint under View Controller Scene —> View Controller —> View —> Constraints.
- Then in the right panel Top Alignment Constraint area, change both First Item and Second Item‘s value to Safe Area.Top in the drop-down list. And input 100 in Constant value.
- Also, change another constraint’s First Item and Second Item‘s value to Safe Area.Leading. And input 100 in Constant value.
- Now the button will be fixed at position(100, 100), and it will auto-layout when the device or device screen orientation is changed.
- The Safe Area is the area that excludes the iOS device status bar. So the layout value is also relative to the safe area border.
- If you want to remove one auto layout constraint, just select the constraints and click the Resolve Auto Layout Issues icon in the constraints manager button bar at the bottom, then select the Clear Constraints menu item to remove it.