This article will tell you what is Xcode Library, Assistant Editor, and Inspector. It will also tell you how to display Xcode Library, Assistant Editor, and Inspector window when you need them. Because for Xcode beginners, you may find you can not find them at some time.
1. Xcode Library.
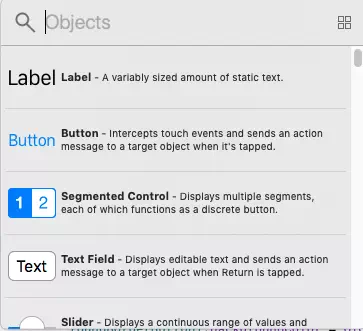
- Xcode is apple provided development tool for users to develop iOS apps, macOS applications, etc. It provides a lot of useful functions. Xcode Library is a collection of UI components that you can use in your iOS or macOS application to design the app’s GUI like below, you always need to find UI components in it.
- But Xcode Library can also be a collection of source code templates, this is decided by which source file you select in your Xcode project. When you select Xcode project’s Main.storyboard file, the Library window shows the above UI components, when you select ViewController.swift file, the Xcode Library window shows source code template like below.

2. Xcode Assistant Editor.
- Xcode Assistant Editor is a window where you can edit the app’s source code, you can connect the UI component with the source code in this window by drag & drop operation.
- You can define outlet variable to refer to the UI component, you can define event process method to respond to UI component action in the assistant editor window also.
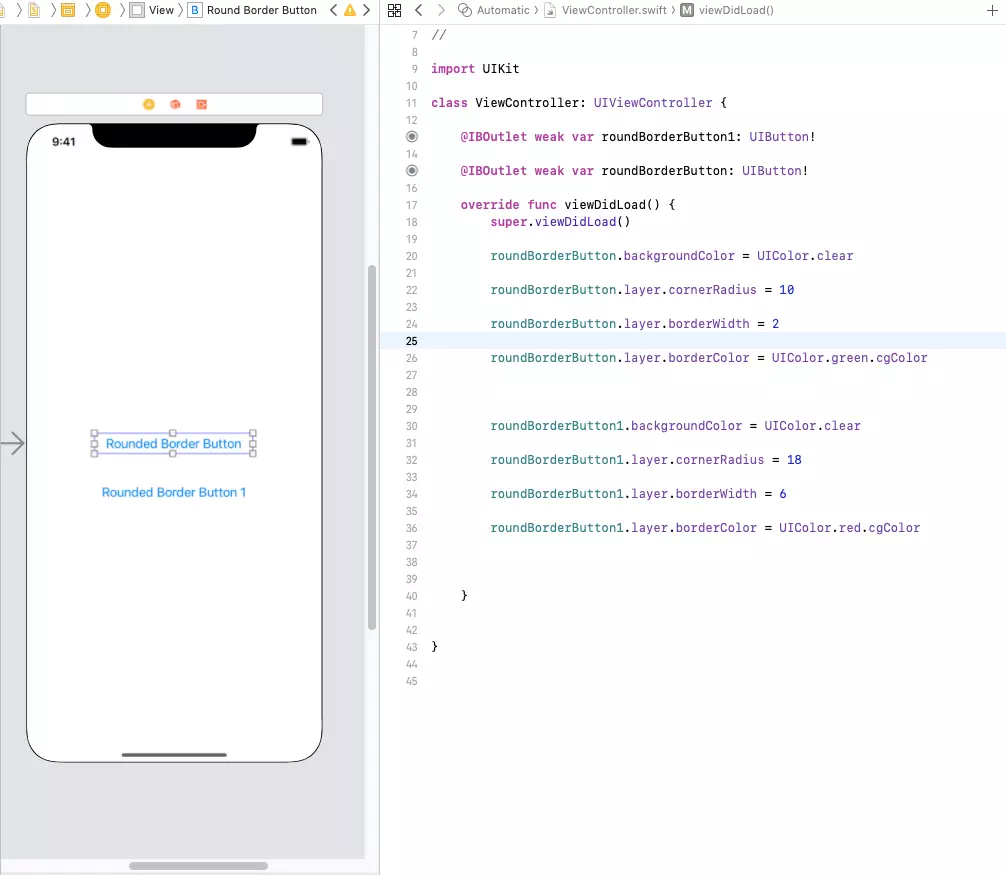
- The source code area in the below picture’s right side is the code assistant editor window.
3. Xcode Inspectors.
- Xcode Inspectors is a window where you can edit the selected UI component’s properties such as title, background color, alignment, etc.
- You can use it after you select a UI component from Xcode Library and drag & drop the UI component to the Xcode Main.storyboard file.
- There are six inspectors, they are File Inspector, Quick Help Inspector, Identity Inspector, Attributes Inspector, Size Inspector, and Connections Inspector. You can click the six shortcut icon at top of the inspector window to show the different inspectors.

4. How To Display Xcode Library Popup Window.
- Start Xcode and create a swift project ( you can read the article How To Create A Swift Project In Xcode ).
- Then click the Main.storyboard file in the left project files list, this will open the iOS app UI designer window in the center panel of Xcode. Please note, if you do not select the Main.storyboard file ( for example you click ViewController.swift to select the swift source code file ), then the popup Library window will not contain UI components collections, it will contain source code template collections.
- Click View —> Libraries —> Show Library menu item at Xcode top menu bar to display the Xcode UI components library popup window.
- You can also click the Library button at Xcode top right corner to popup the Xcode libraries window.
- Then you can input the UI component name keyword ( for example Button ) in the search box to show and select the UI component.
5. How To Display Xcode Assistant Editor For Selected UI Component.
After you design app GUI with UI components, you may need to bind the UI component with the source code class’s property, you may also want to add an event process method to respond to UI component actions such as click, tap, etc. Then Xcode Assistant Editor comes to the stage.
- Click the Main.storyboard file to open it and select and focus on a UI component such as a Button.
- Then click View —> Assistant Editor —> Show Assistant Editor menu item at Xcode top menu bar.
- Then you can see the component Assistant Editor window. You can connect the UI component to the source code property or method, you can read the article iOS Add Click Event To UIButton Swift Example to learn more. If you want to close the assistant editor window, just click the close button at the assistant editor window’s top right corner.
6. How To Display Xcode Inspector Window For Selected UI Component.
When you want to set selected UI component’s properties. You will need to display the Inspectors window.
- Click a UI component in the Xcode project Main.storyboard file to select it.
- Click View —> Inspectors menu item at Xcode top menu bar. Then it will list all inspector sub-menu items, click one submenu item will display a related inspector window.
- For example, if we click Show Attributes Inspector sub menu item, it will display the attributes inspector window for the selected UI component. Then you can set the UI component’s attributes in this window. Please look at the right-most side window in the Xcode editor, that window is the attributes inspector window. You can show different inspector windows by clicking the six shortcut icon button at the top of the window.
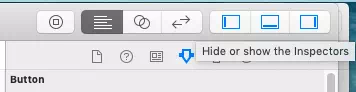
- If you can not see the inspector window, sometimes this is because you hide the inspector window, you can click the Hide or show the Inspectors icon button to show it again. There are three rectangle buttons, this button is the rightmost one. The first one is Hide or show the Navigator button, the second one is Hide or show the Debug area button. Click them will show or hide Navigator or Debug area window.