When you create the android project in android studio, there are a lot of activity templates you can choose which are provided by android studio. For android beginners, the basic activity and the empty activity always make them confused. So what is the difference between them, let me tell you now.
1. Create Basic Activity In Android Project.
- First, you should create an android project. You can read the article How To Create New Android Studio Project to learn how to do it if you do not know.
- During the project creation process, in the Add an Activity to Mobile wizard select the Basic Activity template. Then click the Next button.
- Just click the Next button in all after wizards and use all default values until complete. Then you can see the basic activity template wizard created files and folders listed in the left android Project panel.
2. Basic Activity Template Files Introduction.
- From the above introduction, we can see that the android basic activity template creates a lot of template files, now we will introduce the most important files below.
2.1 Main Activity Java File.
- Double click the MainActivity Java class under the app/java folder to open it. Please note the below java code in the onCreate method.
setContentView(R.layout.activity_main);
- The above code means this activity will use the layout XML file which name is activity_main. You can find the XML file under the app/res/layout folder.
2.2 Main Activity Layout XML File.
- Double click the app/res/layout/activity_main.xml file to open it. You can see that it has already contained some android components definition XML.
<!-- AppBarLayout is used to wrap Toolbar to avoid Toolbar is overlapped by other view components.--> <android.support.design.widget.AppBarLayout android:layout_width="match_parent" android:layout_height="wrap_content" android:theme="@style/AppTheme.AppBarOverlay"> <!-- This is the Toolbar--> <android.support.v7.widget.Toolbar android:id="@+id/toolbar" android:layout_width="match_parent" android:layout_height="?attr/actionBarSize" android:background="?attr/colorPrimary" app:popupTheme="@style/AppTheme.PopupOverlay" /> </android.support.design.widget.AppBarLayout> <!-- Include the main content layout xml file of this application. --> <include layout="@layout/content_main" /> <!-- This is the floating action button which float over the screen. --> <android.support.design.widget.FloatingActionButton android:id="@+id/fab" android:layout_width="wrap_content" android:layout_height="wrap_content" android:layout_gravity="bottom|end" android:layout_margin="@dimen/fab_margin" app:srcCompat="@android:drawable/ic_dialog_email" /> - At the top of the layout XML file is a Toolbar wrapped by AppBarLayout. AppBarLayout is used to wrap Toolbar to avoid Toolbar is overlapped by other view components when screen scroll. Please refer article Android AppBarLayout And Toolbar Example. Android Material Design Toolbar Example.
- After that is an include XML tag. This tag will include the activity content layout XML file which is named content_main.xml. This XML file is also saved in the app/res/layout folder.
- At the layout XML file bottom is a floating action button. This button is introduced in android material design. It is a button floating over the screen. You can read How To Avoid Snackbar Overlap Floating Action Button In Android for a detailed introduction.
2.3 Activity Content Layout XML File.
- Now open the content_main.xml file under the app/res/layout folder, this file is the place where you design your app UI. The template content is too simple, there is only one TextView component in it.
- Click the Design tab under it, you can drag and drop a lot of android UI components into it visually. You can also click the Text tab at the bottom to see the layout XML code.
- In the XML designer Palette area, all android UI components are classified by type, click each type will list the components under it. Under the Palette is Component Tree, which lists all this app’s UI components in a tree, you can easily adjust the UI components’ order and relationship in it.
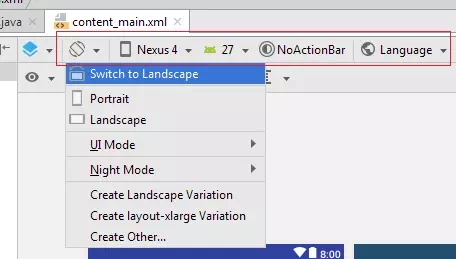
- There is also a toolbar in the android layout XML file designer. Use this toolbar you can look and feel your design instantly with the following actions.
- The below toolbar item can change the screen direction to Portrait or Landscape.
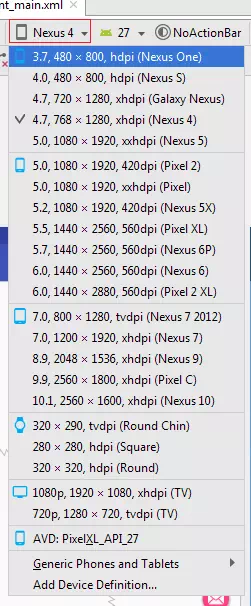
- The below toolbar item can show your design effect on multiple devices.
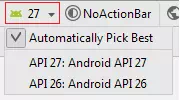
- The below toolbar item can check the UI effect by changing the android API version.
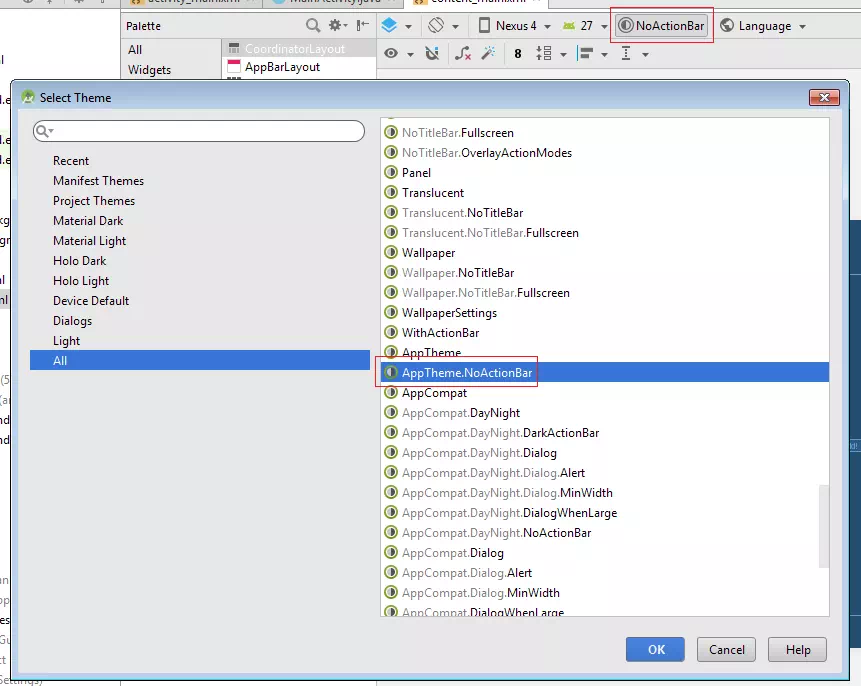
- The below toolbar item can change the activity theme. The activity theme decides how this activity looks and feels. It is used in the application AndroidManifest.xml file, we will introduce it later.
- The last toolbar item can change the app language.
3. Create Empty Activity.
- Right-click the java package, click New —> Activity —> Empty Activity menu item in popup menu list.
- Just click the Finish button and use all the default values. When the process is complete, you can see that there is only one activity java file and one layout XML file.
- Now we can tell that the difference between basic activity and empty activity is basic activity creates a best-practiced standard code skeleton for the android developer but empty activity just creates an activity java and layout XML file.
4. The Android Application Manifest File.
- All the activities are just acting as components in the android app, one android app can contain multiple activities.
- But how to assemble all these activities together to make a complete android app. We use the AndroidManifest.xml file to do this.
- This file is so important for the android app, it is saved in the app/manifests folder.
- Open this file you can see the below XML code. From the XML code, we can get the below results.
- This android application contains two activities.
- Application and activity can use different themes. The theme is defined in the app/res/values/styles.xml file.
- Application and activity label is string variable defined in app/res/values/strings.xml file. This is a good habit than hard coding string value in source code, this can make your app internationalization.
- App icon value is also a reference variable defined in the app/res/mipmap folder.
- Specify MainActivity as the launcher activity by intent-filter category value.
<?xml version="1.0" encoding="utf-8"?>
<manifest xmlns:android="http://schemas.android.com/apk/res/android"
    package="com.dev2qa.android.example.myapplication">

    <application
        android:allowBackup="true"
        android:icon="@mipmap/ic_launcher"
        android:label="@string/app_name"
        android:roundIcon="@mipmap/ic_launcher_round"
        android:supportsRtl="true"
        android:theme="@style/AppTheme">
        <activity
            android:name=".MainActivity"
            android:label="@string/app_name"
            android:theme="@style/AppTheme.NoActionBar">
            <intent-filter>
                <action android:name="android.intent.action.MAIN" />

                <category android:name="android.intent.category.LAUNCHER" />
            </intent-filter>
        </activity>
        <activity android:name=".Main2Activity"></activity>
    </application>

</manifest>
In Android Studio (AS) 4, a Basic Activity is now created, by default, with a pair of fragments. Questions: (1) can this fragment-creation be eliminated? (2) Is this new default behavior of AS implying that a Basic Activity’s interface be defined as a “main fragment”? (3) Even if the answer to (2) is yes, why is it necessary to always get the second fragment created for you? (4) Again, assuming a yes answer to (2): where do the interface callback (e.g., button callbacks) reside, in the activity’s Java file or the fragment’s Java file.
So, what does an empty Activity look like?
It’s literally empty. It has an empty blueprint that you can place components onto.