When using Xcode 11 to create a new iOS project, if you still create the root view controller in AppDelegate class’s – func application(_ application: UIApplication, didFinishLaunchingWithOptions launchOptions: [UIApplication.LaunchOptionsKey: Any]?) -> Bool function as usual, you will find there is a compile time error which said Value of type ‘AppDelegate’ has no member ‘window’. And the root view controller do not take effect.
This is because of the Xcode 11 project template add a new SceneDelegate.swift file in the project, and the SceneDelegate class manage the iOS app’s UI life cycle. Each iOS application can has multiple scenes. And the AppDelegate class only response to the app’s life cycle and manage the iOS app’s multiple scenes.
And in Xcode 11, the template remove the window member variable ( UIKit.UIWindow type ) from AppDelegate class, it add the window member variable to the SceneDelegate class.
So if you want to create the root view controller in iOS app use Xcode 11, you should place the code in below SceneDelegate class’s function func scene(_ scene: UIScene, willConnectTo session: UISceneSession, options connectionOptions: UIScene.ConnectionOptions)
1. Set Application Root View Controller Programmatically In Xcode 11 Example.
- Create an iOS Single View App in Xcode 11.
- Then you can see the SceneDelegate.swift file has been added in the project left navigator panel.
- Open SceneDelegate.swift file, you can see the UIKit.UIWindow type variable window.
- Edit the SceneDelegate.swift file, and copy below source code in SceneDelegate class’s func scene(_ scene: UIScene, willConnectTo session: UISceneSession, options connectionOptions: UIScene.ConnectionOptions) function.
- SceneDelegate.swift File.
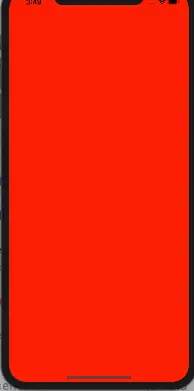
// // SceneDelegate.swift // iOSAppUseXibFiles // // Created by song zhao on 10/26/19. // Copyright © 2019 dev2qa.com. All rights reserved. // import UIKit import UIKit.UIWindow class SceneDelegate: UIResponder, UIWindowSceneDelegate { var window: UIWindow? func scene(_ scene: UIScene, willConnectTo session: UISceneSession, options connectionOptions: UIScene.ConnectionOptions) { print("Scene willConnectTo.") // If this scene's self.window is nil then set a new UIWindow object to it. self.window = self.window ?? UIWindow() // Set this scene's window's background color. self.window!.backgroundColor = UIColor.red // Create a ViewController object and set it as the scene's window's root view controller. self.window!.rootViewController = ViewController() // Make this scene's window be visible. self.window!.makeKeyAndVisible() guard let _ = (scene as? UIWindowScene) else { return } } func sceneDidDisconnect(_ scene: UIScene) { // Called as the scene is being released by the system. // This occurs shortly after the scene enters the background, or when its session is discarded. // Release any resources associated with this scene that can be re-created the next time the scene connects. // The scene may re-connect later, as its session was not neccessarily discarded (see `application:didDiscardSceneSessions` instead). print("sceneDidDisconnect.") } func sceneDidBecomeActive(_ scene: UIScene) { // Called when the scene has moved from an inactive state to an active state. // Use this method to restart any tasks that were paused (or not yet started) when the scene was inactive. print("sceneDidBecomeActive.") } func sceneWillResignActive(_ scene: UIScene) { // Called when the scene will move from an active state to an inactive state. // This may occur due to temporary interruptions (ex. an incoming phone call). print("sceneWillResignActive.") } func sceneWillEnterForeground(_ scene: UIScene) { // Called as the scene transitions from the background to the foreground. // Use this method to undo the changes made on entering the background. print("sceneWillEnterForeground.") } func sceneDidEnterBackground(_ scene: UIScene) { // Called as the scene transitions from the foreground to the background. // Use this method to save data, release shared resources, and store enough scene-specific state information // to restore the scene back to its current state. print("sceneDidEnterBackground.") } } - When you run the above example, you will see the below screen.
- and you can get the below log text in the Xcode debug console.
Scene willConnectTo.
sceneWillEnterForeground.
sceneDidBecomeActive.