When I install mac os high sierra, Mojave, Catalina, or Big Sur on my VirtualBox virtual machine. I meet an error that is can not select the target disk to install the mac os. After investigating I finally find a method to fix this issue. This article will tell you how to fix it step by step. The issue may happen when you reinstall macOS on MacBook also, you can also follow the below steps to fix it.
1. How To Reproduce Can Not Select Disk To Install macOS Error Window.
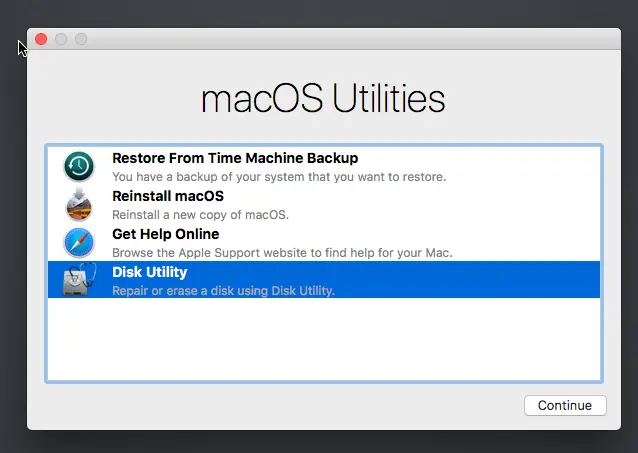
- Start the virtual machine, then select the second item Reinstall macOS in the macOS Utilities window, and click the Continue button.
- Then it will pop up the install macOS High Sierra or Mojave welcome window.
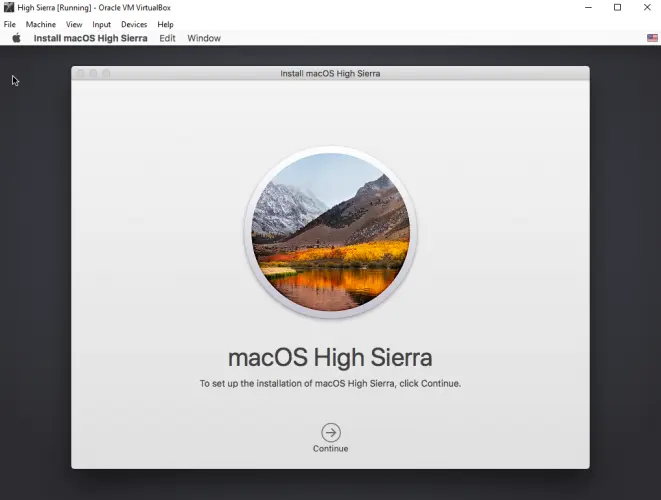
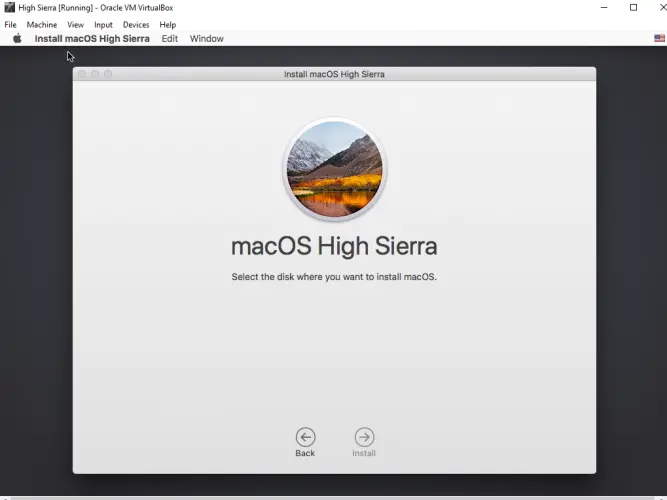
- Click the Continue button in the above window, then click Agree button in the next window. And then it will go to another window to let you select the disk where you want to install os x. But you can not select the disk because there is no disk to select.
2. How To Fix No Disk To Select Error When Install Mac OS On Virtual Machine.
The reason for this issue is that there does not has partition on the virtual disk, so we should first create a partition on the virtual disk, then you can select the virtual disk partition to install mac os.
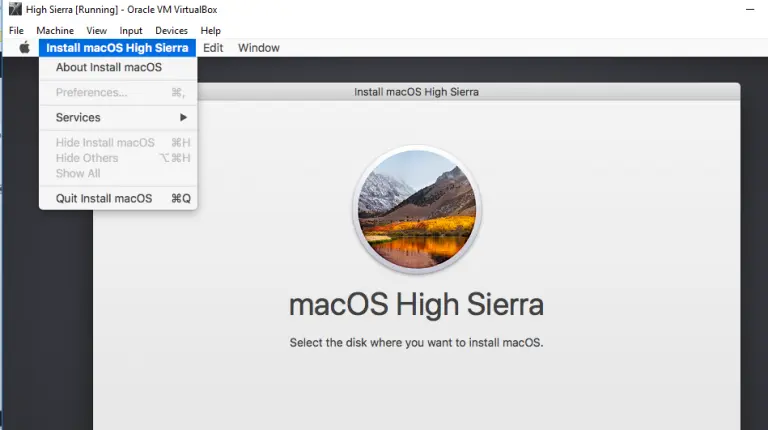
- Click Install macOS High Sierra —> Quit Install macOS menu item at the virtual machine window top-left corner to quit the Install macOS High Sierra wizard.
- Then select Disk Utility in the macOS Utilities window, and click the Continue button.
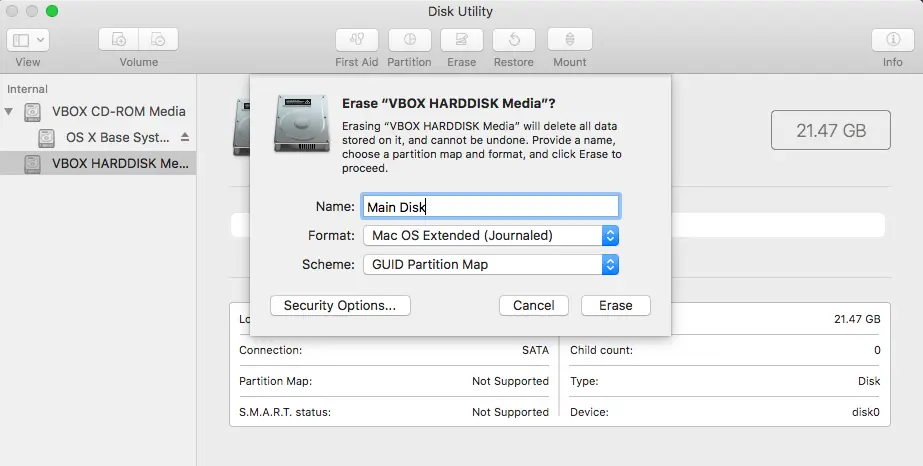
- Select the virtual disk in Disk Utility left panel, then click Erase button at the top bar, it will pop up a window. Input the partition name, select partition format Mac OS Extended ( Journaled ) in the format drop-down list, and click Erase button at bottom of the pop-up window to start creating the partition.
- When the creating partition process is complete, click the Done button to finish it. Then close the Disk Utility window to go back to the macOS Utilities window. Now you can select Reinstall macOS or Install macOS Big Sur to install it again, and you can select the virtual disk partition during the installation process now.

3. Tips When No Disk To Select Issue Happen On Physical MacBook.
- If you find this issue when you reinstall macOS on a Physical MacBook, the above method also makes sense.
- But one thing you should take care of is the physical HDD cable, you should make sure the HDD cable is plugged in tightly.
4. How To Fix Get Stuck With Gray Screen Issue At The Beginning Of macOS Mojave Installation Process.
- When you start the VirtualBox virtual machine to install macOS Mojave, you may see a gray screen at the beginning, and it is stuck there and can not continue.
- To fix this issue, you should use another 64bit guest version in the VirtualBox virtual machine, and enable Use Host I/O Cache in the Storage tab to follow the below steps.
- Right-click the virtual machine, and click the Settings menu item in the popup menu list.
- Click the General tab in the popup dialog, and click the Basic tab under the General tab.
- Select another 64bit macOS version in the Version drop-down list.
- Click the Storage tab after the General tab, and check the Use Host I/O Cache checkbox on the right side ( Storage Devices —> Attributes ) to enable it.
5. Question & Answer.
5.1 No disk to select issue when installing macOS mountain lion on VirtualBox.
- I install VirtualBox 5.8 on Windows 10. And I want to install the macOS Mountain Lion on the VirtualBox virtual machine. When the installation process comes to the screen that said select the disk where you want to install the OS X, I can not get the disk to install, how to fix this issue?
- The reason for this issue is that you do not have any partition on your virtual disk, you can follow the steps below to fix it.
1. Quit the OS X Mountain Lion installation by clicking the menu item Quit Install OS X.
2. Click the Disk Utility item to open the disk manager.
3. Click the Show all disks menu to list all hidden disks.
4. Select the disk that you want to create the partition.
5. Format the disk with Mac OS Extended (Journaled) format on the right side erase tab.
6. Give the partition a name and click the erase button to format it.
7. Now when you install the macOS Mountain Lion again, you can select the disk partition that you just create.
8. If you do not want to remove the existing files on the disk, you have to back up them first and then restore them to the new partition after installing macOS OS X.
Thanks. Worked fine.
thanks it was very useful for me!
You are a Star. The no disk visible solution worked a treat for me on the main drive too.
Worked for me…Thank u so much….
Woo hoo this worked for me, your the man thank you!
Worked!
Worked for me!!! Finally!!
Thank you so so much! It worked!
OMG. Thank You. I thought I screwed it up. Followed Apple Directions to erase my Mac and then i had no drive to select to reinstall OS. Stuff Apple. You guys nailed it. Awesome.
Thankyou so much. It worked.
THANK YOU!!!!
This was so helpful, I hope both sides of your pillow are nice and cold when you sleep
Thank you so much for the help, I was freaking out. Question, is it because my Macbook Air is from 2012 that it’s installing OSX Mountain Lion?
I buy my Macbook Pro in the year 2011, and I can install macOS Catalina on it successfully.
Wow. Really? any tutorial for doing that?
You can refer to the articles https://www.dev2qa.com/how-to-download-macos-mojave-installer-and-convert-to-iso-file/, https://www.dev2qa.com/how-to-install-macos-on-virtualbox-in-windows-10/, and https://www.dev2qa.com/how-to-make-mac-os-big-sur-system-boot-usb-flash-disk/
Oh my god thank you so much! I reached out to Apple and they could not even help me
I am stuck in the install macOS select target disk step. Not able to select. Already format extended journal, GUID. Help plz
Urgent
hi, if you want to attach pictures, please convert the image to .web format image and then attach it, thanks.
Me too.. can’t pick the “ Mac OS Extended” option and can’t erase .. how do I fix it.. did you fix yours
Thank you! This works!
great was looking for it
Thanks! I searched all over VMWare’s documentation, and could not find this essential install info. You rock!
Mine has a place to select where I save to,size,encryption,partitions,and image format. I’m a little confused and need some help.
Thank you SO much, this worked on my macOS Sierra. Life saver!!
Thank You so much,This works for me.
VBox : 6.1
MacOS : Catalina
thank you! very clear to follow instructions.
Awesome! Thank you for much for the helpful article. It worked for me.
Thank you so much! I was tearing my hair out trying to find this solution. Fixed it straight away for me.
Happy to hear this article helps you to fix your issue.
Gave it a try for myself as I was not able to find a disk to install MacOS High Sierra
I went to disk utility and found no drives that were named VBOX Hardware Media or something close to that, nor did I find any drives at 100gb (even though I have already have a drive with 100gb available.
Tried adding a second 100gb drive, but that didn’t work either
You can click the View drop-down list at the left top corner of the disk utility window, and select the Show All Devices, or Show Only Volumes menu item to display all the VBOX HardDisk.
I have no View in the menu. Have found other answers like this already.
thank you so much it worked
Thank you so much
This helped a lot for me
This step was labeled differently (I copy and pasted the step I’m referring to below). There was nothing labeled “virtual disk” or anything like “VBOX”. I also didn’t get a pop-up window, but there was a place to put in the partition name “Main Disk” kind of like the example. And it had a default partition default of “Mac OS Extended (Journaled)” and a place to click erase. Voila! The rest of the steps unfolded as presented in this AWESOME tutorial. Thanks, thanks, thanks!
——————————
Select the virtual disk in Disk Utility left panel, then click Erase button at top bar, it will popup a window. Input the partition name, select partition format Mac OS Extended ( Journaled ) in the format drop down list, click Erase button at bottom of popup window to start creating the partition.
create-partition-use-mac-os-disk-utility
Thank you so much. It worked.
Thank you! This really helped me. I had the same problem with the missing disk.
I don’t have the disk that you used only the two which is the Apple disk Image and OS X Base System, what do I do?
same here please give me info [email protected]
I also have same problem, so I can’t pick a format cause the “Mac OS extended” is it it’s default state and I can’t erase. It’s not letting me it’s just grey
Did you fix yours please let me know
ERASE PROCESS HAS FAILED.
UNMOUNTING DISK
ERASING
COULDNT OPEN DEVICE
OPERATION FAILED
I’m COMPLETELY computer illiterate and I did this and IT WORKED! Thank you so much!!!
Thank you so much I was actually crying I had exams the next day and assignments to do I tried for 5 hours to get the Mac to work but I couldn’t thank you so much!
thank you
thank you so much it’s work now.
It’s Working
It worked just fine for me, Thanks!
Thank you so much ?
Thank you so much! I wasted so much time trying to work this problem out!
thank you so much! It took hours but it worked!!!
This worked perfectly! Thanks very much for the detailed step-by-step 🙂
If I only have a Macintosh HD listed under “Internal”, will selecting “Erase” delete all my existing data?
I had the same problem. Got desperate and tried it as a last resort and it seems to be working!
Thank you so much!!! I start college next week and it’s downloading with 6 minutes remaining so glad i found this and did take it to get fixed!! Thank you so much
Thank you so much simple and to the point!
Hi,
When I start the VM, it gets stuck with a grey screen, with nothing there except for the mouse. Please help me fix this.
Thanks
I have updated the article, you can see section 4 to learn how to fix this issue.
Thank you so much!! This is working!
This saved me and you’re amazing – thank you!
This worked!! Thank you so much, you saved my day ??
This actually worked. Thank you, you saved me!!
Thank you so much ! This actually worked and I had no CLUE of what the heck I was doing . Thank you lifesaver .
Thank you. I can get past the no disk to select issue.
There is a small step missing that’s tripping up some.
You have to click VBOX HARDDISK Media on the left, then Erase.
Worked like a charm for VMWare giving me that same issue. Thanks heaps!
Worked for me. macOS Catalina on VMware gave me that problem.
Can confirm this worked for me too on VMware
Thank you for trying to help, but this did not work for me. I have the same problem as above, but I cannot click the “Erase” button in Disk Utility. It is light grey. I am able to click the First Aid button and it says that the repair is successful. There is still no disk to install when I am asked to select the disk I want to install OS X.
Did you figure out a fix? I’m having the same issue
Any luck? I am in the same boat now.
Did u figure it out? Im having same problem
You can click show all devices in the apple disk utility, in the top left corner. Then all the disks will show up and you can format the one you like.
Maybe you need to mount the disk by hand. You can right-click the Virtual Disk in Disk Utility window left panel and then click Mount button in right panel top area to mount it, then erase it.