The package IPython.display provides a lot of classes for you to display rich media objects in the Jupyter notebook directly and immediately. Using classes in the IPython.display package, you can display audio (local or remote ), video(youtube or local ), image, local file links, Html data in the Jupyter notebook. This article will show you some examples.
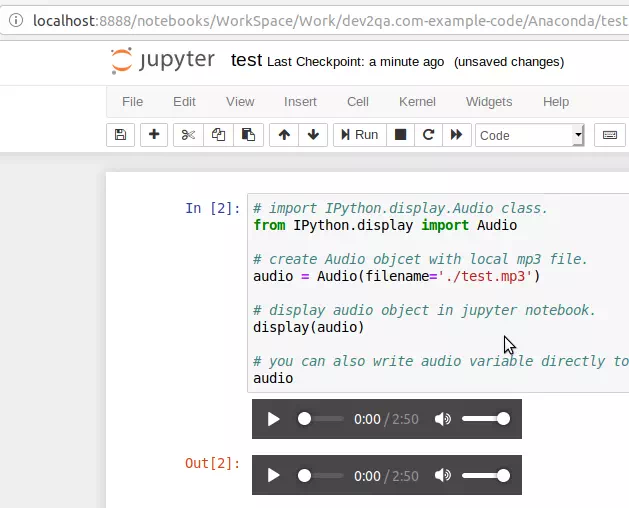
1. Display Audio MP3 File In Jupyter Notebook.
IPython.display.Audioclass is used to display the audio files in the Jupyter notebook. TheIPython.display.Audioclass constructor has the below parameters to specify the audio file path.- IPython.display.Audio(data=None, filename=None, url=None, embed=None, rate=None, autoplay=False) : filename is the local audio file path and name. url is the remote audio file url path.
- Input below source code in the Jupyter notebook line cell. It will display an audio widget on the Jupyter notebook web page which will play a local mp3 file. But you should make sure the mp3 file is saved in the same directory as the Jupyter notebook file ( .pynb file).
# import IPython.display.Audio class.
from IPython.display import Audio

# create Audio objcet with local mp3 file.
audio = Audio(filename='./test.mp3')

# display audio object in jupyter notebook.
display(audio)

# you can also write audio variable directly to display it.
audio
- Then click the run button to execute the above line cell source code, you will get the below picture.
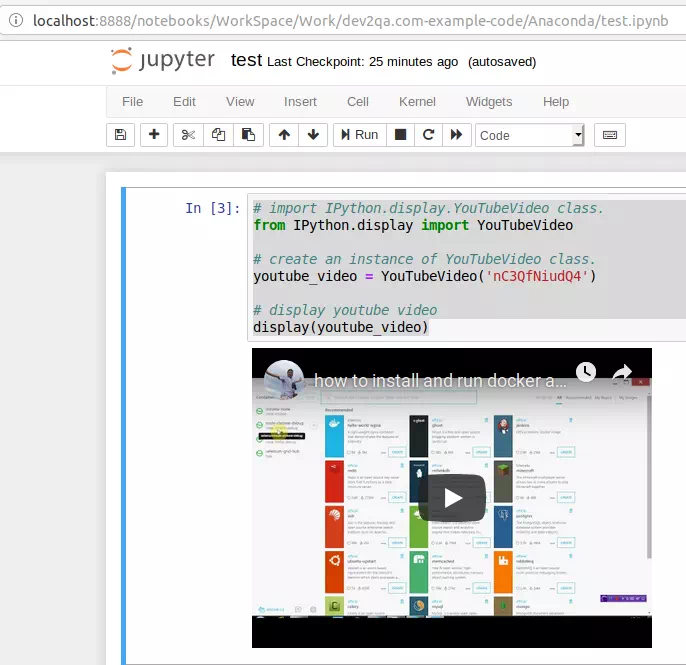
2. Display Video Files In Jupyter Notebook.
2.1 Display Youtube Video.
IPython.display.YouTubeVideoclass is used to display youtube videos, you should provide the youtube video id to create the YouTubeVideo class object.- Input below python source code in one line cell to display youtube video.
# import IPython.display.YouTubeVideo class. from IPython.display import YouTubeVideo # create an instance of YouTubeVideo class with provided youtube video id. youtube_video = YouTubeVideo('nC3QfNiudQ4') # display youtube video display(youtube_video) - Click the run button to run above line cell source code, then you get the below web page.
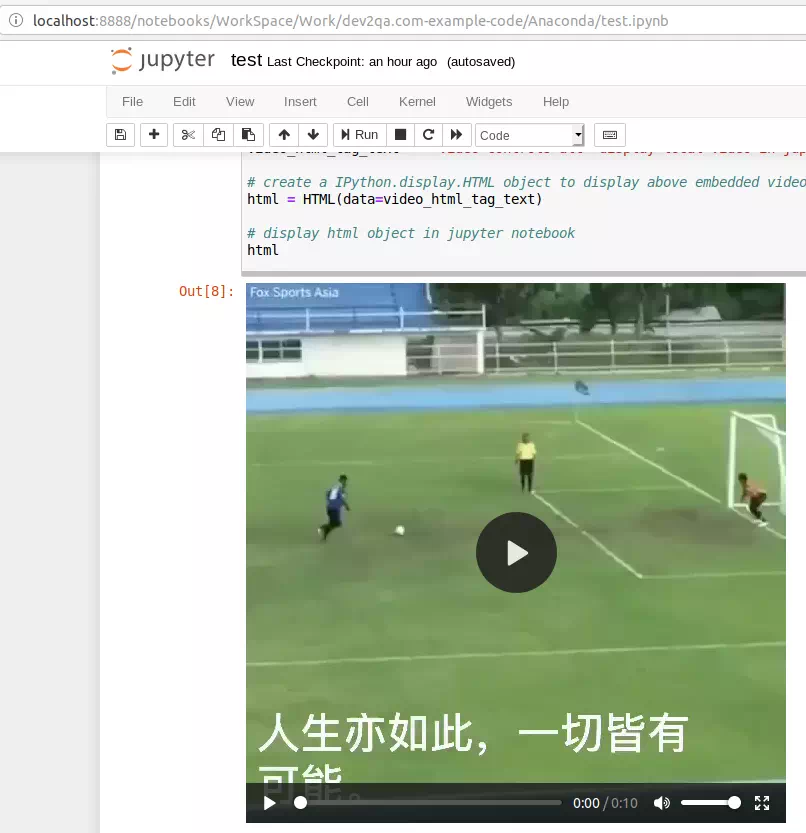
2.2 Display Local Video File.
- To display local video files in the Jupyter notebook, we should use an Html video tag (
<video...), and set the base64 encoded video file content to the src attribute of the Html video tag (<video ..... src='data:video/x-m4v;base64,...... '). So we should use IPython.display.HTML class in this example. - Input below source code in the Jupyter notebook line cell, please make sure the mp4 file is saved in the same directory with the Jupyter notebook file.
# import IPython.display.HTML class, because this example will use html to embed a local video file to display, so need the HTML class. from IPython.display import HTML # import base64.b64encode, the video file need to be encoded with base64 encoding. from base64 import b64encode # open local mp4 video file with read permission, rb means read binary file. file = open("./play_video_test.mp4", "rb") # read the file content to video variable. video_data = file.read() # encode the video content with base64 encoding format. video_data_encoded = b64encode(video_data) # create embedded video html tag text. use base64 encoded video data to replace the {0} placeholder. video_html_tag_text = '<video controls alt="display local video in jupyter notebook" src="data:video/x-m4v;base64,{0}">'.format(video_data_encoded) # create a IPython.display.HTML object to display above embedded video html tag. html = HTML(data=video_html_tag_text) # display html object in jupyter notebook html - When you run the above source code, you will get the below result. It will display a video widget with a control bar at the bottom of the video.
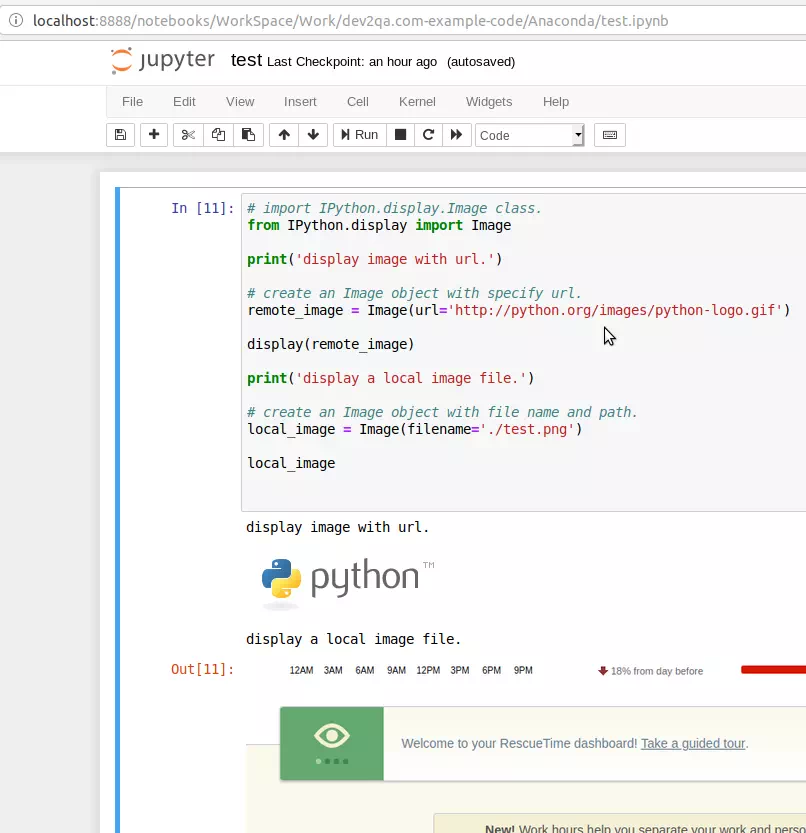
3. Display Image Files In Jupyter Notebook.
3.1 Display Image With Url.
IPython.display.Imageclass is used to display images in the Jupyter notebook. You can specify the image url or image file path and name to tell theIPython.display.Imageclass which image to display.- In the below example, make sure the test.png file is saved in the same directory as the Jupyter notebook file.
# import IPython.display.Image class. from IPython.display import Image print('display image with url.') # create an Image object with specified url. remote_image = Image(url='http://python.org/images/python-logo.gif') # display the remote image in jupyter notebook. display(remote_image) print('display a local image file.') # create an Image object with file path and name. local_image = Image(filename='./test.png') # display the local image in jupyter notebook local_image - Run the above source code will get the below web page.
4. Display Html Content In Jupyter Notebook.
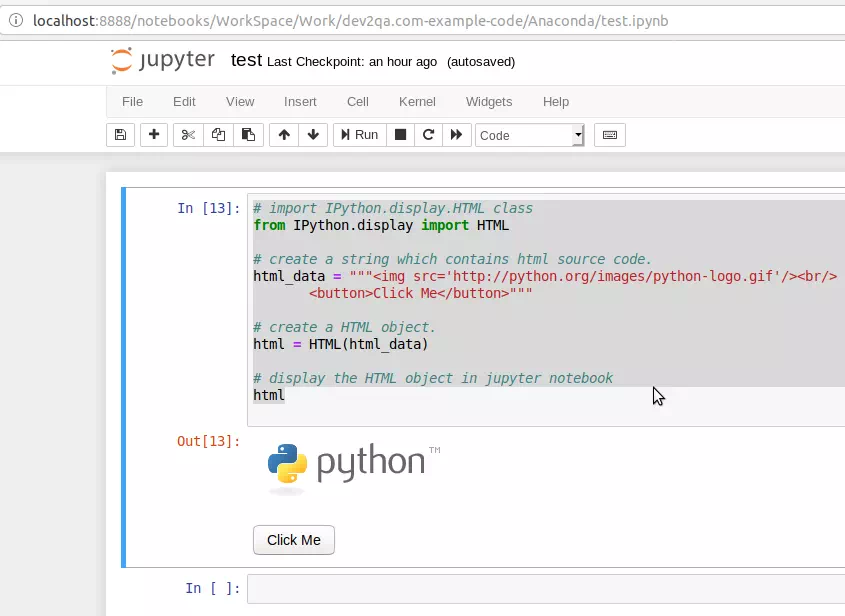
IPython.display.HTMLclass is used to display Html content in Jupyter notebook.# import IPython.display.HTML class from IPython.display import HTML # create a string which contains html source code. html_data = """<img src='http://python.org/images/python-logo.gif'/><br/> <button>Click Me</button>""" # create a HTML object. html = HTML(data=html_data) # display the HTML object in jupyter notebook html- Run the above iPython source code will display Html elements in Jupyter notebook web page like below.
5. Display Local File Link In Jupyter Notebook.
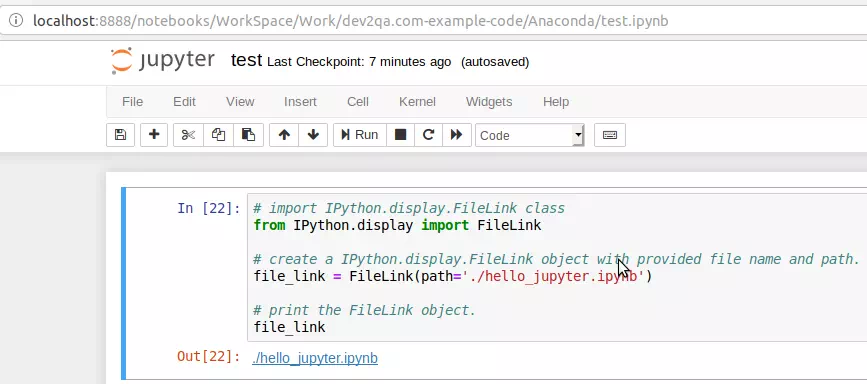
IPython.display.FileLinkclass is used to display a local file link in the Jupyter notebook. The path argument value is the local file path.# import IPython.display.FileLink class from IPython.display import FileLink # create a IPython.display.FileLink object with provided file name and path. file_link = FileLink(path='./hello_jupyter.ipynb') # print the FileLink object. file_link
- Run above source code will display a url link that links to the local file in the Jupyter notebook web page.
6. Display Local Directory Files In Jupyter Notebook.
IPython.display.FileLinksclass is used to display all the files link in provided directory.# import IPython.display.FileLinks class. from IPython.display import FileLinks # create a FileLinks class object provide current directory as the argument. file_links = FileLinks('.') # display all the files link in current directory. display(file_links)- Run the above iPython source code will display all files link in the current directory which the Jupyter notebook ( .ipynb ) file executes.

References