In this article, I will tell you how to add an email subscribe button to a WordPress website. After that, you can make your website visitors to subscribe your blog, and then you can introduce your newly published posts to your subscribers.
1. Introduction Of WordPress Subscription Plugin MailPoet.
- MailPoet is a WordPress subscription plugin, after you install it, you can create subscription forms to let users subscribe to your blog.
- And then you can send emails such as post notifications to the subscriber to let them revisit your website.
- This can increase the website’s stickiness, you can earn more traffic from the subscribers because they are interested in your website post.
2. How To Install MailPoet.
- Log in to your WordPress website, then click the Plugins —> Add New link to open the add new plugin web page.
- Search the keyword MailPoet in the search box, then install it and activate it.
- After installing the plugin, when you log in to your WordPress website, you can see the link MailPoet on the website dashboard’s left side.
3. How To Activate MailPoet.
- Open a web browser and browse the URL https://www.mailpoet.com/ to go to the MailPoet official website.
- Click the Account button on the above home page top right corner to open the login page.
- If you have an existing account then use the account to log in, else you can register an account.
- After you log in to the website, you can click the Sign up to a new plan button to create a new plan.
- Select the Starter plan which is free for 1000 subscribers.
- Then it will create the activation key on the web page.
- Copy the activation key and save it to a local file, we will use it later.
- Log in to your WordPress website, click the MailPoet —> Settings menu item on the left side to open the settings page.
- Click the Key Activation tab on the page’s right side.
- Then input the above activation key in the input text box, and click the Verify button to activate the account.
4. How To Create And Place The Subscription Form.
- Log in to your WordPress website dashboard, then click the MailPoet —> Forms menu item on the left side.
- Click the New Form button on the right side web page top area.
- Click the Select button on the bottom right corner of one template, then it will go to the template design web page.
- Expand the Form Placement item on the form design page’s right side, you can choose where the subscription form is placed on your web page here.
- For example, if you select the Below pages item then the subscription form will be displayed below the web page.
- Click the Below pages item, then it will open the BELOW PAGES panel.
- Turn on the Enable toggle button, then turn on the Display on all pages toggle button, and then turn on the Display on all posts/products toggle button.
- Click the Save button on the top right corner of the page to save the above settings.
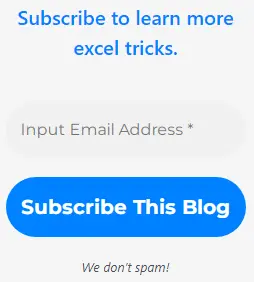
- Then the subscription form will be displayed on the bottom of each page and post.
- You can also place the subscription form as a popup form, fixed bar form, or slide-in form.
- You can also place the subscription form as a widget on the website.
- But before you can use them, you need to click the item to open the placement edit panel and enable it, and you also need to do some configurations when you select different places to put the subscription form.
5. How To Place The Subscription Form As WebSite Widget.
- Log in to your WordPress website dashboard.
- Click the Appearance —> Widgets menu item on the left side of the dashboard page.
- You can find the widget MailPoet in the Available Widgets list.
- Drag the MailPoet widget to the Main Sidebar on the right side.
- Then click the Save button to save the changes.
- Now you can see the MailPoet widget on your WordPress website’s main sidebar area.
6. How To Add Google reCAPTCHA In the Subscription Form.
- Log in to your WordPress website dashboard, click the MailPoet —> Settings menu item on the page left.
- Click the Advanced tab on the page’s right side.
- Scroll down the web page to the Protect your forms against spam signups area.
- Select the radio button Google reCAPTCHA v2 Invisible.
- Then you can input the Google reCAPTCHA site key and secret key in the related input text box.
- Click the Save settings button to save the above changes.
7. How To See The Website Subscriber List.
- Log in to your WordPress dashboard, and click the MailPoet —> Subscribers menu item.
- Then you can see your website subscribers list on the page’s right side.
8. How To Send Post Notification Email To Your WebSite Subscribers.
- Log in to your WordPress dashboard, and click the MailPoet —>Emails menu item.
- Click the New email button to create a new email.
- Click the Set up button on the bottom right corner of the Latest Post Notifications item, then it will open the Post Notification tab.
- You can select when will the post notification email is sent in this tab.
- Click the Next button to go to the Template list page, you can select an email template on this page.
- Then it will go to the Design tab, there are some components on the design page, including the Automatic Latest Content component.
- This component will list the latest posts in the email content.
- Select the component, and click the Edit settings icon ( a gear icon ), it will open the component settings panel on the page’s right side.
- You can set the number of posts in the email content in the panel.
- Click the Done button to save the changes.
- Click the Save button to save the settings as a template.
- Click the Next button to go to the Activate page.
- Select a subscriber list from the Lists drop-down list.
- Change the reply-to name and email address in the Replay-to area.
- Click the Activate button to activate the post notification email.
- Then it will auto-send the latest posts to the subscribers by the configuration.