When you view pictures on Mac OS, you may find you can only view one picture at one time. If you want to view another image picture, you should close the first image viewer, and then click and open the second image in a new image preview viewer. This is not user-friendly. This article will tell you how to view multiple image pictures on mac continuously.
1. How To View Single Image Picture On Mac.
- Open Finder and go to your image picture files folder.
- Select one image picture by clicking the mouse key.

- Press the Space key to view it, it will open an image viewer for you to view it. If you press the Space key again, it will close the image viewer.

2. How To View Multiple Image Pictures On Mac Continuously.
- Press Shift key + Mouse button to select multiple image picture files in macOS Finder.

- Now press the Space key on the keyboard, it will open an image picture viewer, and you can find the previous & next navigator buttons at the top left corner of the image viewer, then you can click those two buttons to view the image picture continuously.

3. View Multiple Image Pictures Continuously In Mac OS Preview App.
- Method 2 can help you to view the multiple pictures continuously, but you should view the multiple images one by one in order, if you want to jump to view the picture which you want, please follow this method.
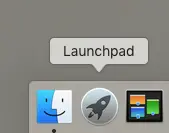
- Click the Launchpad in the Mac OS docker.
- Then search keyword Preview in the launchpad search box.
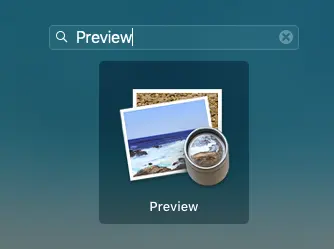
- Open app Preview by clicking it.
- Click File —> Open menu item at Preview app top menu bar, then browse and select multiple image pictures that you want to view.
- After the above steps, you can see a picture list panel on the Preview app left side, and you can jump to view any picture that you like.
4. How To Make Picture SlideShow On macOS.
- If you want to slideshow selected images on macOS, you can follow the below steps.
- Click the mouse button to select the first image file in the macOS finder.
- Press the Shift key and use the mouse button to select all the image files.
- Or press the Command key and use the mouse button to select multiple image files one by one.
- Press the Option key + White space bar at the same time, then it will start a full-screen slideshow.
- Press the white space bar to play/pause the slideshow.
- Press the left arrow key or right arrow key to navigate the image slideshow.
- If you want to view all the image’s thumbnail icons, you can click the Index Sheet button on the slide show screen.

- Click the Share button on the slideshow screen, you can share the picture to any mac app.

- Press the Control key and swipe two fingers on the MacBook touchpad, it can zoom in the picture.
- Press the Esc key to quit the slideshow.
mac os is pathetic they cannot make a stupid photo browser
My macOS is macOS Catalina Version 10.15.7, and this method can work on it.