When you create an iOS app and run it in a simulator, you may find that the default app icon on the screen is a grid picture, this is not beautiful. This article will tell you two methods about how to change the default iOS app icon to your desired icon both in a simulator and when you publish your app to the app store.
1. Change iOS App Icon In Xcode Simulator Steps.
If you just want to change the iOS app icon in an iOS device simulator, you can follow the below steps. But if you want to publish your iOS app to Apple app store, you should use method two.
- Find an icon image from the internet such as https://icons8.com/ and save the icon image in a local directory. Note: the icon size of iOS 11 must be 120*120 pixels.
- In the Xcode project, right-click the info.plist file and select Add Files to “project name” menu item.
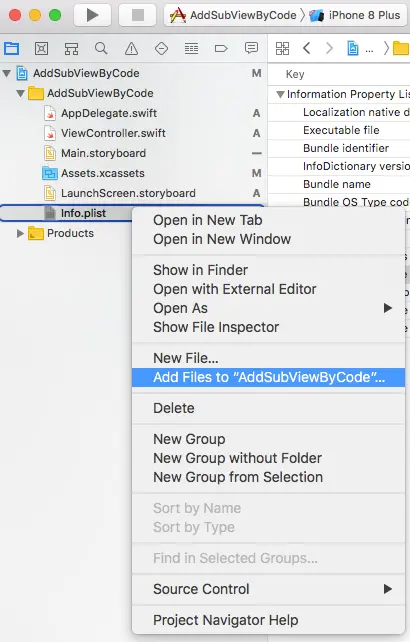
- Select the iOS app icon image file, and check the Create groups radio button. Click Add button to add it.
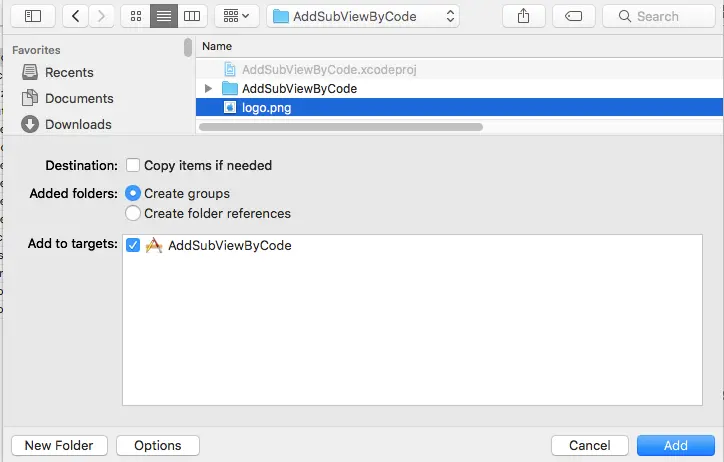
- Now the logo.png file has been added to the project, you can see it in the left panel project navigator files list.
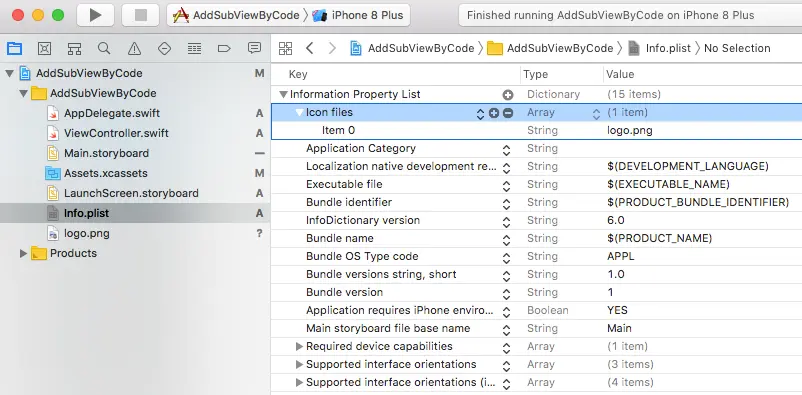
- Click the info.plist file again to open it. And click the plus button after the Information Property List item to add a new property item. Input Icon files in the item key and select Array in the item Type column. Expand the Icon files item and input the icon image file name in the Value column manually.
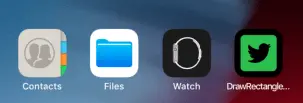
- Now when you run the app again, you can see the app use the selected icon on the screen. In this example, my example iOS app uses a green Twitter image icon like the below picture.
2. Set iOS App Icon For Publish It To App Store.
Method one is just used to set app icon in the iOS simulator, if you want to set the iOS app icon when the app is published to the Apple app store, you should follow the below steps.
- When you create an Xcode project use one template such as Single View App, there is an assets catalog file created in the project file list. The file name is Assets.xcassets.

- Click the Assets.xcassets file, it will display all project assets set in the middle document outline view. By default there is only one AppIcon set, you should provide all the iOS app icons in this set.
- Click the AppIcon set, it will display all the iOS app needed icons in the right detail view. You should get all the icons for both iPhone and iPad’s screen app, settings, notification, spotlight, and app store with different screen resolutions. And then drag & drop them to the right detail view one by one.
- To save your time, you can find one png image in iconfinder.com and download it to your local machine.
- One png image is not enough, you need to create icons for all the sizes with the download image. You can go to makeappicon.com to upload the image and then generate all the iOS app needed icons.

- Makeappicon.com will generate a zip file, it will send the zip file to your provided email box.
- After downloading the zip file and unzip it, you can find below file structures. It contains all mobile platforms ( iOS, Android, iWatch, etc) needed icons.
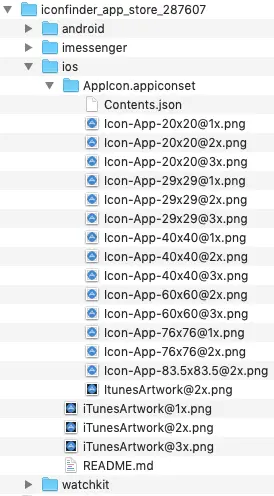
- Now you need to copy these icons into the Xcode project, what you need to do is just drag the folder AppIcon.appiconset under the iOS folder, and drop it to Assets.xcassets‘s document outline view. Below is this example demo video ( drag ios app icons folder from finder to xcode project assets xcassets document outline view ).
- Besides drag & drop the app icon files into the Assets.xcassets, you can also do this in macOS Finder, we will introduce it in section 3.
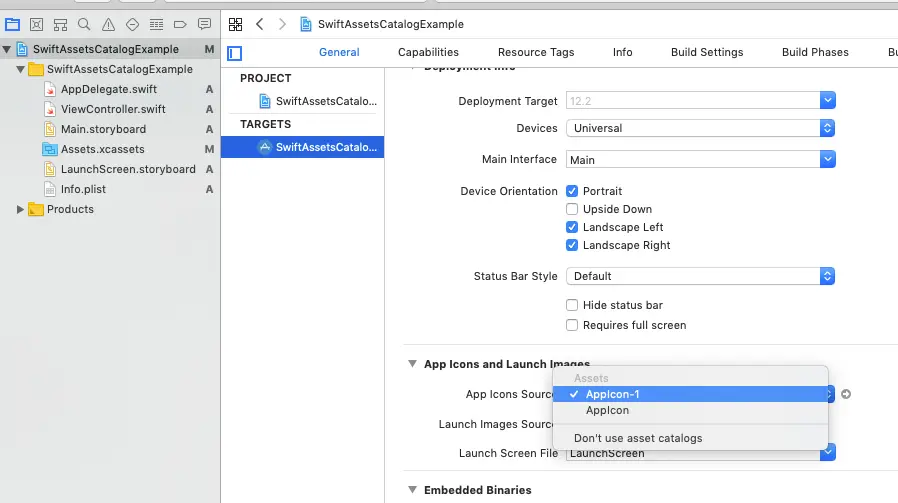
- Now it will create a new iOS AppIcon set which name is AppIcon-1. Click this icon set, you will see all the iOS app needed icons in the right detail view.
- Now click the Xcode project in the left panel, click one target in the center document outline view TARGETS list to select it, then click General tab and select AppIcon-1 in right panel App Icons and Launch Images area App Icons Source drop-down list.
- Now start the iOS simulator, it will start the app, just press the bottom of the app’s main screen and throw it to the top, it will hide the app main screen and display the app icon on the screen like below.

3. How To Copy iOS App Icon Files To Xcode Assets.xcassets In macOS Finder.
- The
Assets.xcassetsunder your Xcode project is just a folder. So you can open it in macOS Finder. - When you open it, you can find another folder inside it, the folder name is
AppIcon.appiconset. - You can also open the
Assets.xcassets/AppIcon.appiconsetfolder in Xcode by clicking theAssets.xcassetsin the left project panel, and then right-click the AppIcon on the right side, then click the Show in Finder menu item. - Now you can copy all the icon image files from your saved location to this folder in macOS Finder.
- And you can refresh the
Assets.xcassetsin Xcode to see the changes. - You may also find there is a JSON file
Contents.jsonin theAssets.xcassets/AppIcon.appiconsetfolder. This file will be created when you drag & drop the iOS app icon files into the Xcode projectAssets.xcassets/AppIcon. - If this file does not exist, you can create it manually.
- Then you can modify the
Contents.jsonfile like below to contain the icon images that you have copied.{ "images" : [ { "size" : "20x20", "idiom" : "iphone", "filename" : "[email protected]", "scale" : "2x" }, { "size" : "20x20", "idiom" : "iphone", "filename" : "[email protected]", "scale" : "3x" }, { "size" : "29x29", "idiom" : "iphone", "filename" : "[email protected]", "scale" : "1x" }, { "size" : "29x29", "idiom" : "iphone", "filename" : "[email protected]", "scale" : "2x" }, { "size" : "29x29", "idiom" : "iphone", "filename" : "[email protected]", "scale" : "3x" }, { "size" : "40x40", "idiom" : "iphone", "filename" : "[email protected]", "scale" : "2x" }, { "size" : "40x40", "idiom" : "iphone", "filename" : "[email protected]", "scale" : "3x" }, { "size" : "60x60", "idiom" : "iphone", "filename" : "[email protected]", "scale" : "2x" }, { "size" : "60x60", "idiom" : "iphone", "filename" : "[email protected]", "scale" : "3x" }, { "size" : "20x20", "idiom" : "ipad", "filename" : "[email protected]", "scale" : "1x" }, { "size" : "20x20", "idiom" : "ipad", "filename" : "[email protected]", "scale" : "2x" }, { "size" : "29x29", "idiom" : "ipad", "filename" : "[email protected]", "scale" : "1x" }, { "size" : "29x29", "idiom" : "ipad", "filename" : "[email protected]", "scale" : "2x" }, { "size" : "40x40", "idiom" : "ipad", "filename" : "[email protected]", "scale" : "1x" }, { "size" : "40x40", "idiom" : "ipad", "filename" : "[email protected]", "scale" : "2x" }, { "size" : "76x76", "idiom" : "ipad", "filename" : "[email protected]", "scale" : "1x" }, { "size" : "76x76", "idiom" : "ipad", "filename" : "[email protected]", "scale" : "2x" }, { "size" : "83.5x83.5", "idiom" : "ipad", "filename" : "[email protected]", "scale" : "2x" }, { "size" : "1024x1024", "idiom" : "ios-marketing", "filename" : "[email protected]", "scale" : "1x" }, { "size" : "76x76", "idiom" : "iphone", "filename" : "[email protected]", "scale" : "2x" } ], "info" : { "version" : 1, "author" : "xcode" } }
4. Video Demo For This Article.
- You can watch this example demo video below.
Great post! The step-by-step guide was really helpful, and I loved the tips for optimizing the icon sizes. Can’t wait to try this out on my next project!
Great tips! The step-by-step instructions made it really easy to follow. I appreciate the clarification on the size requirements for each icon. Thanks for sharing!
Great post! The step-by-step instructions made it super easy to set the app icon in my Xcode project. Thanks for sharing these helpful tips!
Great tips on setting up the app icon! I struggled with this for a while, but your step-by-step guide made it so much easier. Thanks for sharing!
Great post! I found the step-by-step instructions really helpful, especially the tips on resizing the icons properly. This will definitely save me a lot of time in my next project. Thanks for sharing!
Great post! The step-by-step instructions made it really easy to follow. I especially appreciated the tips on using the Asset Catalog for managing app icons. Thanks for sharing!
Great tips! I struggled with setting the app icon in Xcode, but your step-by-step guide made it so much easier. Thanks for sharing these helpful tricks!
Great tips! I found the step-by-step instructions really helpful for setting up my app icon. The screenshots made it super easy to follow along. Thanks for sharing!
Thanks a lot. Very good tutorial
Thanks, That was a nice article..
Saved my life
>> Now when you run the app again, you can see the app use the
>> selected icon in the screen.
Doesn’t work for me.
What error message have you got?
It didn’t work for me. I am trying to figure it out. Anybody know how to do it?
What error message have you got? Can you send it here? Thanks.