Xcode uses workspace and projects to manage swift source code. When you develop an iOS app, you should first create a workspace, and then create and add a new project into it. You can also add existing projects into the Xcode workspace. This article will tell you how to do it.
1. How To Create Xcode Workspace.
- Launch Xcode tool, click File —> New —> Workspace… menu item at Xcode top menu bar to open a popup dialog window.
- Input a workspace name and select a saved directory in the popup dialog window, then click the Save button. After that, it will create a workspace file with file extension .xcworkspace like below. The example workspace name is iOSExampleWorkSpace.
/Users/songzhao/Documents/WorkSpace/dev2qa.com—example-code/iOSExampleProject

iOSExampleWorkSpace.xcworkspace
SwiftAppWithoutStoryboardExample
2. How To Add New Xcode Project Into Workspace.
2.1 Open Xcode Workspace File In Xcode Tool First.
Before creating a new Xcode project, you should first make sure the Xcode workspace has been opened in the Xcode tool follow the below steps.
- Launch Xcode, click File —> Open menu item at Xcode top menu bar. Browse and select the Xcode workspace file you just created in section 1.
- Now you will find there is nothing in the Xcode workspace. If you do not close or exit Xcode after creating the Xcode workspace in section 1, you will see an empty and blank Xcode window directly.
2.2 Add New Xcode Project Into Workspace When Create It.
- Click File —> New —> Project… menu item in Xcode top menu bar.
- Select an iOS app template in the popup dialog window, click the Next button.
- Input Xcode product name and choose coding language ( swift ) in the next wizard dialog, then click the Next button.
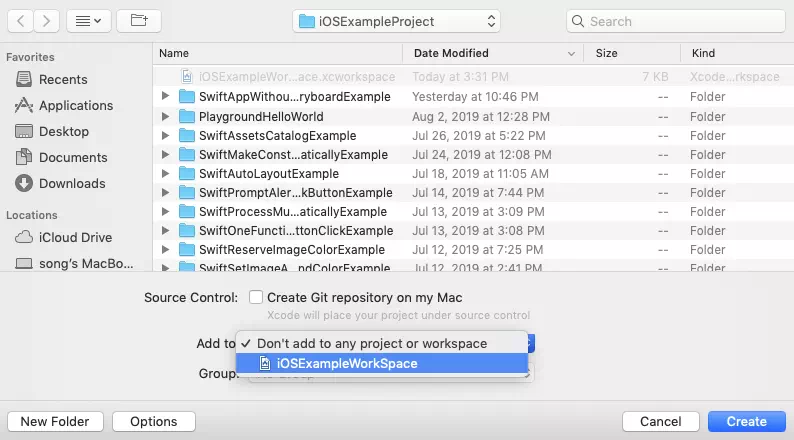
- Select the workspace name in the Add to drop-down list, click Create button.
- Now you can see the newly created Xcode project has been added to the workspace. When you exit the Xcode tool and launch it again, and when you open the Xcode workspace file again, you can see the project is listed in the left navigator pane.
3. How To Add Exist Project Into Xcode Workspace.
- Launch Xcode and open the workspace file in it.
- Click File —> Add Files to “Workspace name” ( for example Add Files to “iOSExampleWorkSpace”…) menu item at Xcode top menu bar.
- Select the Xcode project file ( with file extension .xcodeproj ) in the project saved folder. Then click Add button.
- Now you can see the existing Xcode project has been added in the workspace in the left navigator pane. You can add multiple exist projects follow the above steps.
- To make it simple, you can also drag the Xcode project file ( file extension .xcodeproj ) from the project saved folder and drop it to the Xcode workspace navigator pane.
Useful, thanks!