One of the most useful skills you should take is to deploy and debug Tomcat within your Java EE Integrated Development Environment. This skill can make it easy for you to find out the reason why your Java EE web application goes wrong as well as debug and fix the problem quickly. In this article we will show you how to use Eclipse to set up, debug and deploy web applications in Tomcat step by step.
1. Steps To Install Eclipse Java EE.
- Click the Download Eclipse link to go to the download page. Click the related link in the download section to download the correct version for your operating system.
- After download, unzip the zip file into a local folder. I unzip it to “C:\WorkSpace\dev2qa.com\Tool\eclipse-jee-neon-3-win32-x86_64\eclipse” in my windows.
- Then you can click the file eclipse.exe to start it up. You can also create a shortcut for eclipse.exe on windows desktop.
2. Steps To Setup Tomcat 9 In Eclipse.
- Click here to learn how to install Tomcat 9 on your operating system if you do not know. You just need to install Tomcat with the command-line version.
- Open your Java EE eclipse editor, click Window —> Preferences.
- Click Server —> Runtime Environment in the left panel. Then click the Add button in the right panel.
- Choose Apache —> Apache Tomcat v9.0 in the popup dialog.
- Do not forget to check the Create a new local server checkbox, this can create the Tomcat server in your eclipse development environment which will be used for error debug later. Then click the Next button.
- Click the Browse… button in the next New Server Runtime Environment dialog to select your Tomcat 9.0 home directory (Where you unzip Tomcat 9.0 zip file to).
- You can choose either Workbench default JRE or your installed JRE. Then click the Finish button.
- Now you can see your Tomcat is installed in the Server —> Runtime Environment —> Server Runtime Environments list.
- Then click the OK button to return to the Eclipse workbench.
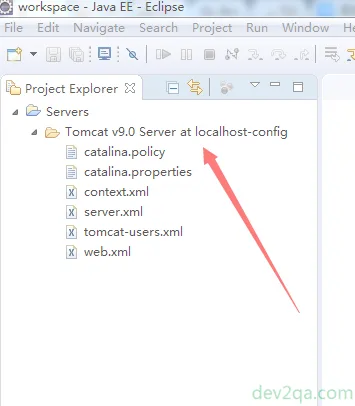
- When you return to the workbench, you can see a Servers folder in Project Explorer in the left panel. This is just the Server that you can use to deploy and debug Java EE web application code.
3. How to use Tomcat In Java Web Project.
- Click File —> New —> Dynamic Web Project to create a new web application project in java EE Eclipse IDE.
- Input project name and choose project save folder in the popup New Dynamic Web Project dialog. Choose correct target runtime.
- Click the Next button twice then go to the Web Module dialog, check the Generate web.xml deployment descriptor checkbox, this can create the web.xml automatically in the web application project.
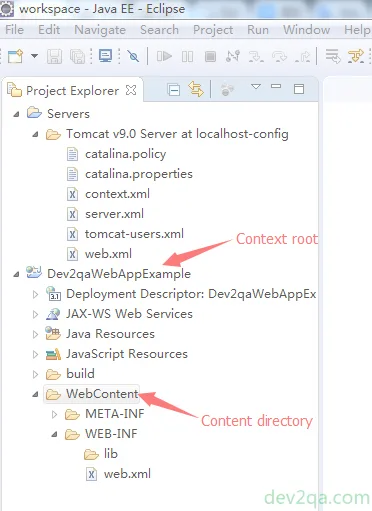
- Please note the Context root and the Content directory in the above Web Module dialog.
- Context root‘s value is your web application’s path name in the page URL. If it’s value is Dev2qaWebAppExample, then you need to use the URL http://localhost:8080/Dev2qaWebAppExample/ to access this web application.
- The Content directory is the directory where your all web application’s components stored in.
- After clicking the Finish button, you can see the Context root value is just the java EE project name in the eclipse IDE left panel and the Content directory value is WebContent that contains the WEB-INF subfolder.
- Right-click the java web application’s project name. Click Properties in the popup menu list.
- Click Server in the left panel then chooses Tomcat v9.0 Server at localhost in the right panel.
- If you want to change the web application’s context root, you can click the Web Project Settings item in the Project Properties dialog left panel, and change it in the right panel.
- Click OK to save the settings.
4. How to debug code with Tomcat?
To demo debug process in eclipse with Tomcat, we need to create an index.jsp file, this file also included in the web application’s welcome file list.
4.1 Create index.jsp File.
- Right-click the WebContent folder.
- Click New —> JSP File menu item in the popup menu list.
- Change the jsp file name to index.jsp. Click Next then click the Finish button.
- Open index.jsp and write the below source code into it. This java code will get the current time in a long integer variable and print it out on the page.
<body>

<%

   long currTime = System.currentTimeMillis();

%>

CurrentTime is <%=currTime %>

</body>
- Double click the beginning of each java code line to set or remove a breakpoint.
- Right-click project name, click Debug As —> Debug on server menu item to start tomcat debugging.
- Then Tomcat started and the process stopped at the breakpoint you just set.
- You can press F6 to “step over” or F5 to “step into” the java code or “Ctrl + F12” to stop the debugging.
- If you click F8 to resume the debug process, you will see an eclipse internal web browser opened and display the web application’s welcome file. You can change the default running web browser by the below method.
- Click the Java EE icon at the eclipse IDE editor right top corner.
- Click the Eclipse Window —> Web Browser menu item to choose the default running browser for debugging.