This example will tell you how to use the custom angular js component to display an array of string data in the Html ul list. It will use two methods to implement it. This example is based on Angular JS Hello World Example, you can read it first.
1. Angular UL List Example Description.
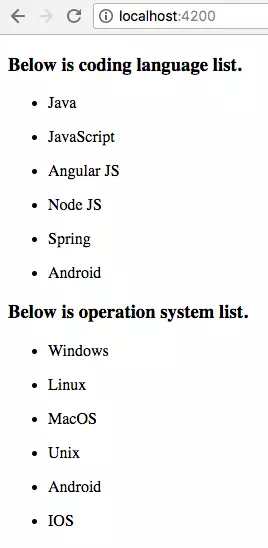
- Before dive into detailed source code, let us first look at the example result page.
- There are two ul lists, the above is implemented by a custom angular component ul-list ( render the list data directly in template Html ), the bottom is implemented by ul-list and single-item custom angular module ( ul-list template Html page use single-item component selector tag to render each array data. ).
2. Display List Data In One Angular JS Component.
- First, you need to create an angular js project folder, please refer to Angular JS Hello World Example.
- Then run the below command in the hello-world directory to create the ul-list component.
$ ng generate component ul-list
- It will generate the below component source files under the src/app/ul-list folder. We will focus on ul-list.component.ts and ul-list.component.html.
C:\WORKSPACE\WORK\DEV2QA.COM-EXAMPLE-CODE\JAVASCRIPTEXAMPLEWORKSPACE\ANGULARJSWORKSPACE\HELLO-WORLD\SRC\APP │ app.component.css │ app.component.html │ app.component.spec.ts │ app.component.ts │ app.module.ts │ ├───hello-world-tag │ hello-world-tag.component.css │ hello-world-tag.component.html │ hello-world-tag.component.spec.ts │ hello-world-tag.component.ts │ ├───single-item │ single-item.component.css │ single-item.component.html │ single-item.component.spec.ts │ single-item.component.ts │ └───ul-list ul-list.component.css ul-list.component.html ul-list.component.spec.ts ul-list.component.ts - ul-list.component.ts: This is the ul-list component class definition file.
import { Component, OnInit } from '@angular/core'; @Component({ // The html tag selector is app-ul-list. selector: 'app-ul-list', // Below is render template html and css files. templateUrl: './ul-list.component.html', styleUrls: ['./ul-list.component.css'] }) export class UlListComponent implements OnInit { // Declare language title attribute. languageTitle : string; // Declare languageArray string array attribute. languageArray : string[]; // Declare os title attribute. osTitle : string; // Declare osArray string array attribute. osArray : string[]; constructor() { // Init attributes values in the class constructor method. this.languageTitle = 'Below is coding language list.'; this.languageArray = ['Java', 'JavaScript', 'Angular JS', 'Node JS', 'Spring', 'Android']; this.osTitle = 'Below is operation system list. '; this.osArray = ['Windows', 'Linux', 'MacOS', 'Unix', 'Android', 'IOS']; } ngOnInit() { } } - ul-list.component.html: This is the ul-list component UI rendering Html file. There are two parts to this Html file.
- Part1 uses the ngFor command to get each language value from the languageArray array variable and print the value as the li content.
- Part2 uses the ngFor command to get each os value from the osArray array variable and assign the os value to the app-single-item tag’s implementation class’s item attribute value. Then display the item value in the app-single-item tag.
- The ngFor command is a repeat command. It’s value is ‘let variable_name of an_array’ means get each array value and assign that value to variable_name.
<!-- Part1 : Display class languageTitle attribute value. -->
<h3>{{languageTitle}}</h3>

<!-- Use ngFor to loop in the class languageArray array and display each language. -->
<ul *ngFor="let lauguage of languageArray">

  <li>{{lauguage}}</li>

</ul>


<!--Part2 : Display class osTitle attribute value. -->
<h3>{{osTitle}}</h3>

<!-- Invoke another component to display each array item value.

     app-single-item is another custom component.

     *ngFor="let os of osArray" : use ngFor command to iterate the osArray array.

     [item]="os" : assign each os value to app-single-item's item attribute.

     Then app-single-item will display the item value in it's render template html file ../single-item/single-item.component.html
-->
<app-single-item
  *ngFor="let os of osArray"
  [item]="os" >
</app-single-item>
3. Display List Data Use Two Angular JS Component.
- The ul-list component can display each array data in ul -> li Html tag directly in Part1, it can also display each array data in the app-single-item component in Part2. Below is just the source code for the app-single-item module.
C:\WORKSPACE\WORK\DEV2QA.COM-EXAMPLE-CODE\JAVASCRIPTEXAMPLEWORKSPACE\ANGULARJSWORKSPACE\HELLO-WORLD\SRC\APP │ app.component.css │ app.component.html │ app.component.spec.ts │ app.component.ts │ app.module.ts │ ├───hello-world-tag │ hello-world-tag.component.css │ hello-world-tag.component.html │ hello-world-tag.component.spec.ts │ hello-world-tag.component.ts │ ├───single-item │ single-item.component.css │ single-item.component.html │ single-item.component.spec.ts │ single-item.component.ts │ └───ul-list ul-list.component.css ul-list.component.html ul-list.component.spec.ts ul-list.component.ts - Go to the hello-world folder and run the below command to create the single-item component.
$ ng generate component single-item
- single-item.component.ts: Because the class variable item‘s value is passed from the ul-list component, so you should import the Input component and decorate the item with @Input().
// Add Input decoration component in the import section. import {Component, Input, OnInit} from '@angular/core'; @Component({ // Component selector html tag. selector: 'app-single-item', templateUrl: './single-item.component.html', styleUrls: ['./single-item.component.css'] }) export class SingleItemComponent implements OnInit { /* Input() annotation means item attribute value is passed from outside.*/ @Input() item : string; constructor() { } ngOnInit() { } } - single-item.component.html
<ul> <!-- Display the component class item value --> <li>{{item}}</li> </ul> - To make the example execute, you must change the hello-world/src/app/app.component.html file content to below.
<!-- Use the custom ul-list component selector tag. -->
<app-ul-list></app-ul-list>
- Double click hello-world/src/app/ app.module.ts file, you can find all the component has been imported and declared in it’s module declarations area.
import { BrowserModule } from '@angular/platform-browser';
import { NgModule } from '@angular/core';
import { AppComponent } from './app.component';
import { HelloWorldTagComponent } from './hello-world-tag/hello-world-tag.component';
import { UlListComponent } from './ul-list/ul-list.component';
import { SingleItemComponent } from './single-item/single-item.component';

@NgModule({
  declarations: [
    AppComponent,
    HelloWorldTagComponent,
    UlListComponent,
    SingleItemComponent
  ],
  imports: [
    BrowserModule
  ],
  providers: [],
  bootstrap: [AppComponent]
})
export class AppModule { }