The android overflow menu is located at the top toolbar of the android application. You can add menu items in it for users to navigate to different screens. This article will tell you how to customize the overflow menu items to fit your needs.
1. Android Custom Overflow Menu Items Steps.
- Create an android project with the Empty Activity template.
- Create the menu folder under the app/res folder.
- Add a custom overflow menu xml file in app / res / menu folder.
- Inflate the overflow menu xml file in activity’s onCreateOptionsMenu(Menu menu) method.
- Override onOptionsItemSelected(MenuItem item) method in main activity class, and write code in this method to process user click menu item event.
2. Android Custom Overflow Menu Example.
- In this example, the overflow menu contains three single radio checkbox menu items.
- When you click each menu item, the main activity background and text view text will be changed.
- Below is this example demo video ( android custom overflow menu example ).
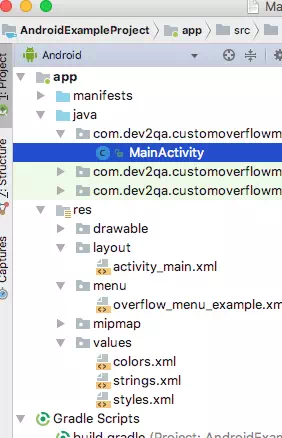
- Below is the project files structure that is used in this example.
2.1 Main Activity.
- MainActivity.java
package com.dev2qa.customoverflowmenu;

import android.graphics.Color;
import android.support.v7.app.AppCompatActivity;
import android.os.Bundle;
import android.view.Menu;
import android.view.MenuInflater;
import android.view.MenuItem;
import android.widget.LinearLayout;
import android.widget.TextView;

public class MainActivity extends AppCompatActivity {

    @Override
    protected void onCreate(Bundle savedInstanceState) {
        super.onCreate(savedInstanceState);
        setContentView(R.layout.activity_main);
    }


    /* Override this method to inflate the overflow menu xml file. */
    @Override
    public boolean onCreateOptionsMenu(Menu menu) {

        // Get menu inflater object.
        MenuInflater menuInflater = getMenuInflater();

        // Inflate the custom overflow menu
        menuInflater.inflate(R.menu.overflow_menu_example, menu);

        return true;
    }

    /* When user select a menu item in the overflow menu xml file, this method will be invoked. */
    @Override
    public boolean onOptionsItemSelected(MenuItem item) {

        // Get the main activity layout object.
        LinearLayout mainLayout = (LinearLayout)findViewById(R.id.linear_layout);

        // Get the text view object.
        TextView textView = (TextView)findViewById(R.id.text_view);

        // Get clicked menu item id.
        int itemId = item.getItemId();

        if(itemId == R.id.red_menu)
        {
            mainLayout.setBackgroundColor(Color.RED);
            textView.setText("You select red menu.");
        }else if(itemId == R.id.yellow_menu)
        {
            mainLayout.setBackgroundColor(Color.YELLOW);
            textView.setText("You select yellow menu.");
        }else if(itemId == R.id.green_menu)
        {
            mainLayout.setBackgroundColor(Color.GREEN);
            textView.setText("You select green menu.");
        }


        return true;
    }
}
2.2 Main Activity Layout Xml File.
- app / res / layout / activity_main.xml
<LinearLayout
    android:id="@+id/linear_layout"
    android:layout_width="match_parent"
    android:layout_height="match_parent"
    android:orientation="vertical"
    android:gravity="center">

    <TextView
        android:id="@+id/text_view"
        android:layout_width="wrap_content"
        android:layout_height="wrap_content"
        android:textSize="20dp"
        android:textColor="@color/colorPrimary"
        android:text="Select menu item at right top overflow menu."/>

</LinearLayout>
2.3 Overflow Menu Xml File.
- Right click menu folder, click New —> Menu resource file menu item in the popup menu list to create this file.
- app / res / menu / overflow_menu_example.xml
<?xml version="1.0" encoding="utf-8"?>
<menu xmlns:app="http://schemas.android.com/apk/res-auto"
    xmlns:android="http://schemas.android.com/apk/res/android">

    <group android:checkableBehavior="single">

        <item
            android:id="@+id/red_menu"
            android:title="@string/string_red"
            app:showAsAction="never"
            android:orderInCategory="1"/>

        <item
            android:id="@+id/yellow_menu"
            android:title="@string/string_yellow"
            app:showAsAction="never"
            android:orderInCategory="2"/>

        <item
            android:id="@+id/green_menu"
            android:title="@string/string_green"
            app:showAsAction="never"
            android:orderInCategory="3"/>

    </group>
</menu>
2.4 String Values Xml File.
- app / res / values / strings.xml
<resources>
    <string name="app_name">CustomOverflowMenu</string>

    <string name="string_red">Red</string>

    <string name="string_yellow">Yellow</string>

    <string name="string_green">Green</string>
</resources>