MySql is a very popular relational SQL database server software. It is widely used in huge of websites as a database server. This article will tell you how to install the MySql database server and GUI client tool on macOS to make MySql database management easy. It will also tell you how to start, stop, restart and connect to the MySQL database server in the command line.
1. Install MySql Database Server On Mac.
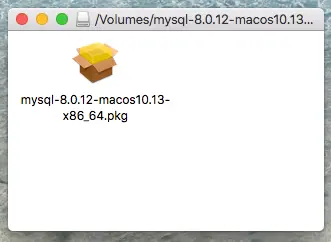
- Download MySql Server community version for macOS.
- Click the downloaded dmg file to open the MySql server installer package.
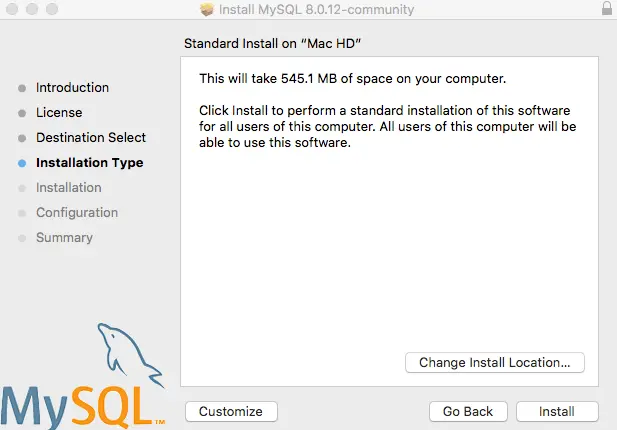
- Click the Next button in the wizard dialog until go to the Change Install Location… dialog, then click the Install button to install it.
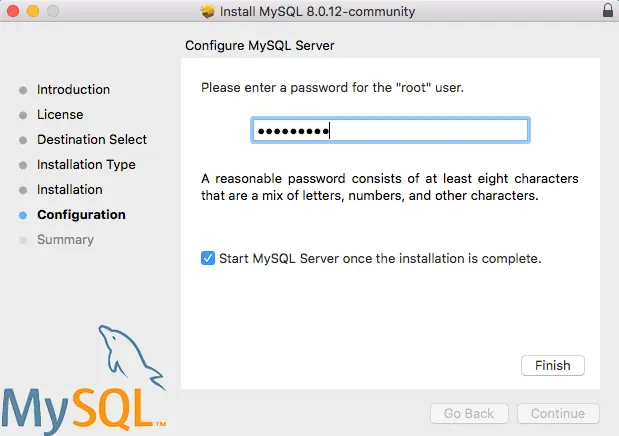
- After installation, it will display Configure MySQL Server dialog, input the root user’s password. And click the Finish button to complete the MySql server installation.
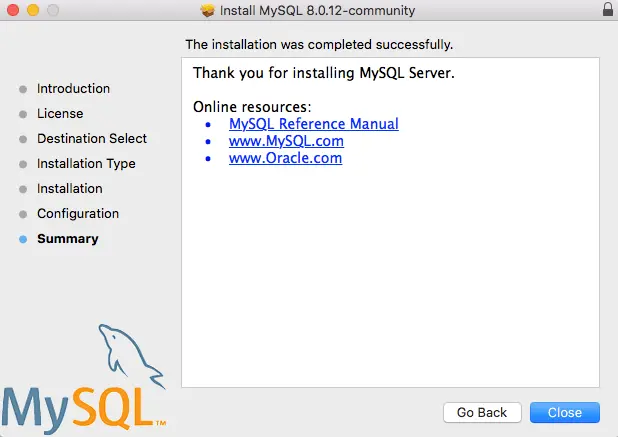
- Now MySql server has been installed successfully.
2. Start, Stop, Configure MySql Server.
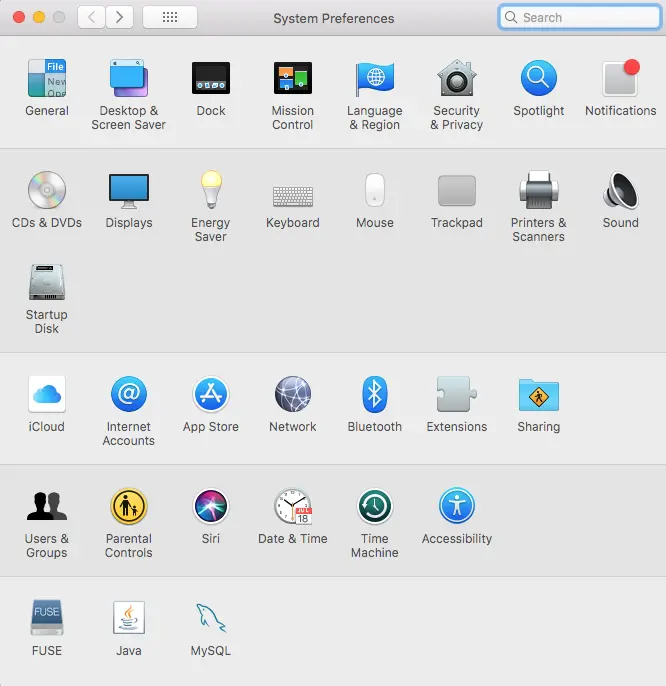
- Open macOS System Preferences.
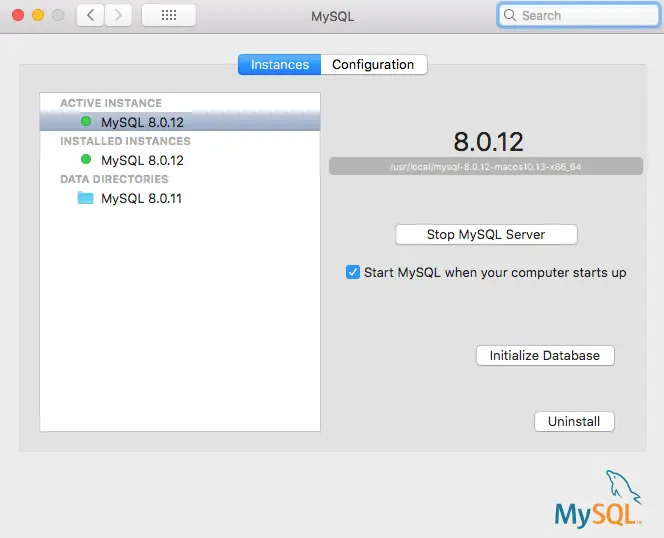
- Click the MySQL icon to open the MySQL configuration dialog. Then you can start, stop and configure the MySQL server in it.
3. Manage MySQL Database With MySQL Workbench.
- Download MySQL Workbench community version.
- Click the downloaded dmg file to install it.
- Open MySQL workbench application.
- Connect to the local MySQL database server.
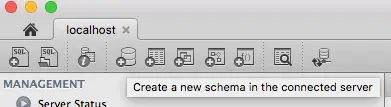
- Click the Create a new schema in the connected server button to create a database.
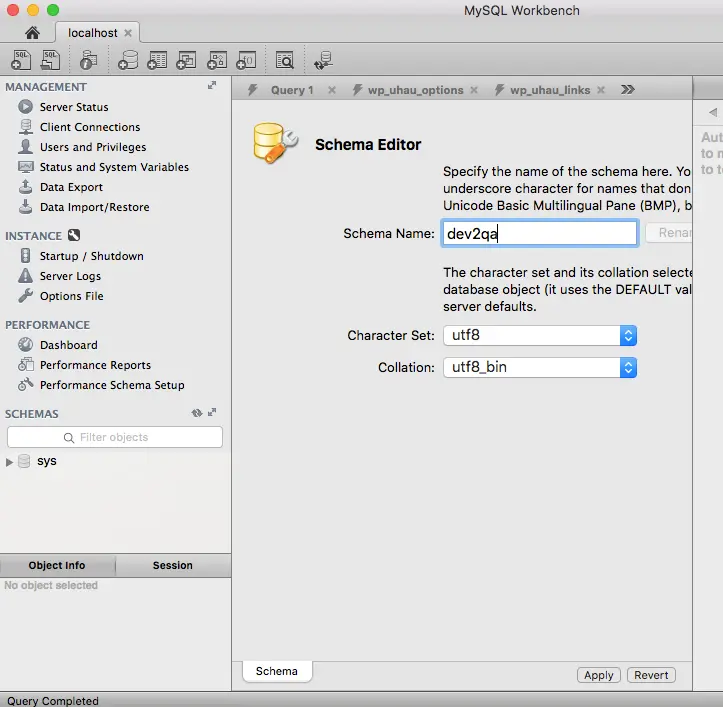
- Input MySQL Schema name (database name) and select database character set and collation ( usually use utf8 and utf8_bin). Click Apply button to create the database.
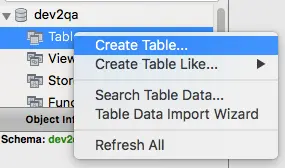
- Right-click the Tables item under dev2qa database then clicks Create Table… menu item to create a table.
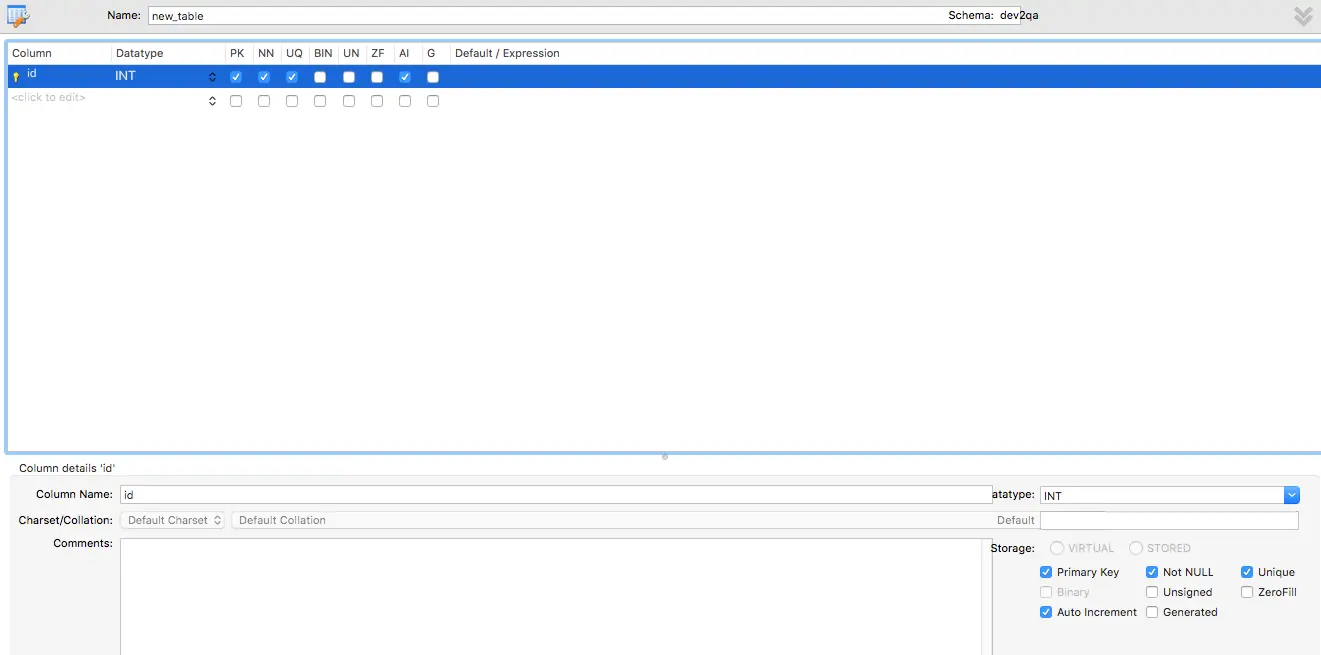
- Input table name at top text box. Then click table row to add one column, input column name, select datatype, and other column options(Primary Key, Not Null, Unique, Auto Increment, Binary, etc).
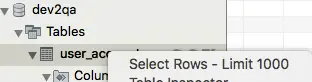
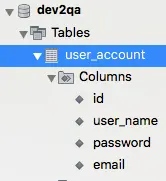
- Right-click user_account table, click Select Rows – Limit 1000 menu item to open edit table data dialog in the right panel to insert data into the table.
4. Create MySQL User and Assign Privileges To The User.
- Click Users and Privileges menu item in the left MySQL workbench panel.
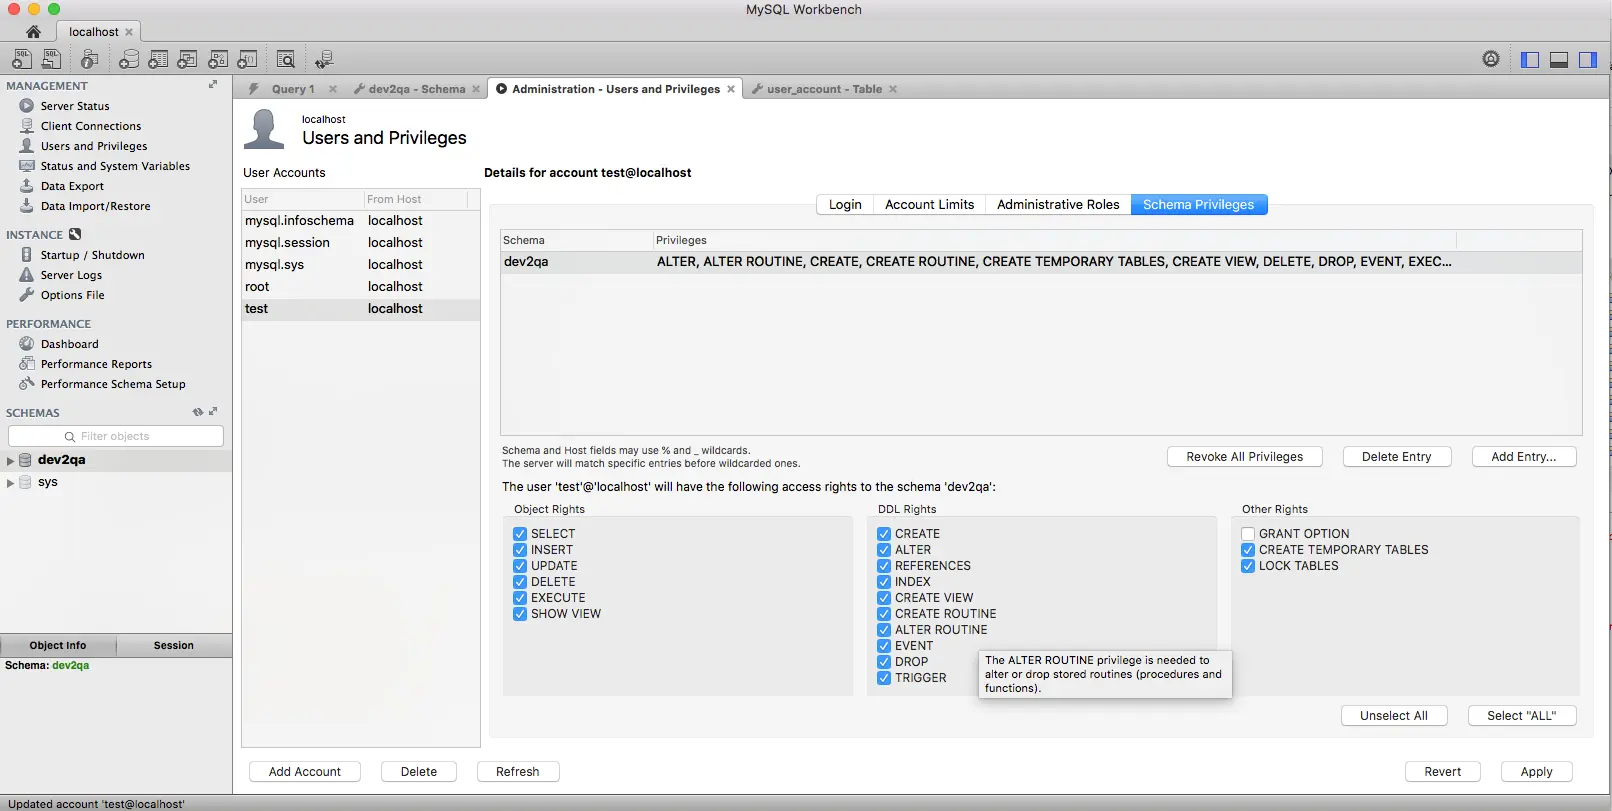
- Click Add Account button at the bottom of the right panel.
- Input user name and password in the new panel.
- Click Administrative Roles tab to select related roles and assign them to the newly created MySQL user.
- Click Schema Privileges tab to assign MySQL database (schema) privileges to the user by click Add Entry… button. You can select all databases, or special databases either by matching string pattern or exactly string match.
- Then select desired Object Rights, DDL Rights, or Other Rights checkboxes at the bottom, then click Apply button to apply the selected privileges to the created user.
5. Create Example User Account Table.
In our MySQL JDBC examples, we always use a table user_account, so we should create this table use MySQL workbench. Below is the table DDL SQL code, you can also run it to create this table.
To execute the below DDL code, just click Create a new SQL tab for executing queries button (  ) at MySQL workbench toolbar top left corner to open a SQL command execute window, and then copy below code into it. Then click execute button(the first lightning icon
  ) at the top toolbar of the SQL window to execute the code.
CREATE TABLE `user_account` (
`id` int(11) NOT NULL AUTO_INCREMENT,
`user_name` varchar(100) COLLATE utf8_bin NOT NULL,
`password` varchar(100) COLLATE utf8_bin NOT NULL,
`email` varchar(100) COLLATE utf8_bin NOT NULL,
PRIMARY KEY (`id`)
) ENGINE=InnoDB AUTO_INCREMENT=21 DEFAULT CHARSET=utf8 COLLATE=utf8_bin
6. How To Connect MySQL Server In Command-Line.
- After you install the MySQL database server, it is installed in the directory /usr/local/mysql.
- You can run the command
/usr/local/mysql/bin/mysql -u root -pto connect to the MySQL database server as below. After you input the correct password ( the root password which you set during the MySQL installation ), you can enter the MySQL interactive console.$ /usr/local/mysql/bin/mysql -u root -p Enter password: Welcome to the MySQL monitor. Commands end with ; or \g. Your MySQL connection id is 8 Server version: 8.0.23 MySQL Community Server - GPL Copyright (c) 2000, 2021, Oracle and/or its affiliates. Oracle is a registered trademark of Oracle Corporation and/or its affiliates. Other names may be trademarks of their respective owners. Type 'help;' or '\h' for help. Type '\c' to clear the current input statement. mysql>
- If you do not provide the -p parameter in the above command, you may encounter ERROR 1045 (28000): Access denied for user ‘root’@’localhost’ (using password: NO).
$ /usr/local/mysql/bin/mysql -u root
ERROR 1045 (28000): Access denied for user 'root'@'localhost' (using password: NO)
- You can add the MySQL binary directory in the macOS PATH system environment variable to make it more convenient to connect to the MySQL database server in the command line follow below steps.
# First go to the user home directory. $ cd ~ $ pwd /Users/songzhao # Edit the user .bash_pforile file. $ sudo vim .bash_profile # Add below content at the end of the .bash_profile file. Save and exit. # Add MySQL binary folder in the macOS system environment variable PATH. PATH="/usr/local/mysql/bin:${PATH}" export PATH # Verify the .bash_profile has been changed as required. $ cat .bash_profile # Make the above changes take effect in macOS. $ source .bash_profile # Now you can run mysql command directly in terminal to connect to the MySQL database server. $ mysql -u root -p - To exit the MySQL command line console, input the exit command and press enter key.
mysql> exit
Bye
7. How To Start / Stop MySQL Server In Command-Line.
- Run
sudo mysqld stopcommand to stop MySQL database server in the command line.$ sudo mysqld stop 2021-02-27T11:51:29.507234Z 0 [System] [MY-010116] [Server] /usr/local/mysql-8.0.23-macos10.15-x86_64/bin/mysqld (mysqld 8.0.23) starting as process 5364 2021-02-27T11:51:29.511721Z 0 [Warning] [MY-010159] [Server] Setting lower_case_table_names=2 because file system for /usr/local/mysql-8.0.23-macos10.15-x86_64/data/ is case insensitive 2021-02-27T11:51:29.511796Z 0 [ERROR] [MY-010123] [Server] Fatal error: Please read "Security" section of the manual to find out how to run mysqld as root! 2021-02-27T11:51:29.511886Z 0 [ERROR] [MY-010119] [Server] Aborting 2021-02-27T11:51:29.512192Z 0 [System] [MY-010910] [Server] /usr/local/mysql-8.0.23-macos10.15-x86_64/bin/mysqld: Shutdown complete (mysqld 8.0.23) MySQL Community Server - GPL.
- From the above output, we can see it throw a fatal error [ERROR] [MY-010123] [Server] Fatal error: Please read “Security” section of the manual to find out how to run mysqld as root!
- To fix this error, we should run the command
$ /usr/local/mysql/bin/mysqladmin --port=8889 -u root -p shutdownto stop the MySQL database server. - Run the below command to start the MySQL database server in macOS command line.
$ sudo /usr/local/mysql/support-files/mysql.server start
Starting MySQL
.Logging to '/usr/local/mysql/data/songs-MacBook-Pro.local.err'.
. SUCCESS!
- You can also stop, restart the MySQL database server using the above
mysql.servercommand like below.# Stop the MySQL database server. $ sudo /usr/local/mysql/support-files/mysql.server stop Shutting down MySQL . SUCCESS! # Restart the MySQL database server. $ sudo /usr/local/mysql/support-files/mysql.server restart ERROR! MySQL server PID file could not be found! Starting MySQL .. SUCCESS!
Please tell me how to install mysql database installation and its connection step by step for python and java.I have tried many times but i make some mistake.So i need your help.
How to install mysql and connection for python GUI project?
How to install oracle database and its connection for java JDK?
Hi,
I’ve just installed MySQL and MySQL Workbench. When I try to connect to Local Instance (mine is called Local Instance 3306), once I’ve typed the password (the one I chose for the Oracle account), there’s a popup reading :
Authentication plugin ‘caching_sha2_password’ reported error: Authentication requires secure connection.
Any idea how to move forward ?
Thanks
I have a .sql database I download from my web host’s server. It’s from a old version of Zen Cart e-shop I created several years ago and there’s a PHP codebase problem. I need to rebuild the cart. Your instructions show only creating a new database, can I simply open this existing .sql database with Workbench to make edits or copy the data? Any advice would be appreciated.
Thank you.
Thanks,
Can I connect to MySQL socket with this ?
Because I’m unable to find a .sock file…
What problem do you get when connect to MySQL server, can you show me the error messages? Thanks.